Ceiling repairs are important for the continued attractiveness and security of your home. A beautiful and well-maintained ceiling is essential to the safety and longevity of any building.
This page contains helpful information and advice for repairing ceilings, whether you're a house or business owner.
A wise homeowner can typically successfully fix ceiling cracks without too much hassle by adhering to a few time-honoured practices. The challenge is determining what to do first, what resources to use, and when to call in the experts.
Damage Assessment
It is crucial to evaluate the level of damage to your ceiling before beginning any repairs. Inspect the area for any obvious symptoms of damage, such as cracks, water stains, sagging, etc. The method and materials required for the repair can be narrowed down once the root cause has been established.
What Can Cause Ceiling Damage?
When fixing or installing something, water damage is usually the root of the problem. One or more moisture intrusion symptoms can be a warning sign of a deteriorating roof, a concealed plumbing leak, or inadequate ventilation in your home. But it's not immune to other problems that could arise.
You'll have an easier time getting help when you need it if you know what the warning flags are for repairs and installations. The top warning indicators for ceiling repair are listed below.
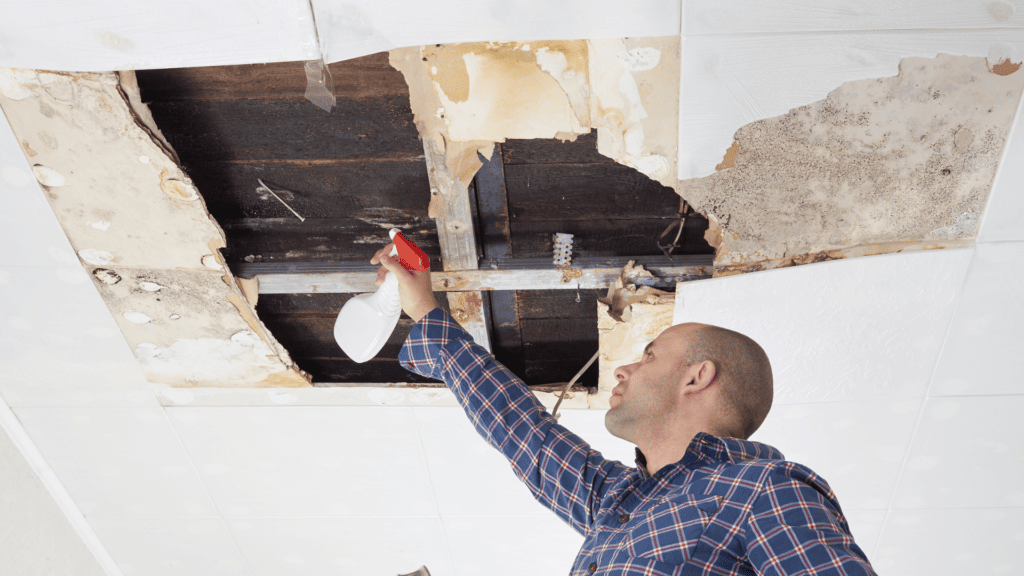
Mould, Mildew, And Water Stains
A large brown water stain is an ominous sign, and patches of mould or mildew are even worse, whether the wall material is drywall, plaster, or panels.
The presence of water wreaks havoc, potentially weakening them to the point where they collapse on you, causing injury and costly cleanup.
A ceiling installation service would certainly be required to replace the damaged material, but repair is achievable if caught early.
If you don't hire a skilled handyperson to figure out and fix the source of the damage, it will keep happening again and again.

Flaking And Peeling Paint
Water damage might also be indicated by paint that is flaking and peeling. A less catastrophic but worrying cause could be excess condensation from inadequate ventilation.
Steam from hot showers, for instance, can condense on neighbouring surfaces if the bathroom does not have enough ventilation. The Wallboard penetrated by this moisture expands, pushing the paint to fracture and peel.
Discolouration From Rust And Wood Deterioration
Spots of rust on tin or patches of wood rot on wood panels or beams are signs of moisture damage to ornate metal ceilings or wooden planks.
This indicates that ceiling maintenance, or possibly ceiling replacement and installation, is required.
While rust is easy to notice, wood rot in the ceiling might be more of a mystery. Close inspection of any potentially dangerous spots is encouraged.
- Soft, spongy, or stringy wood; or wood that is webbed with cracks
- Fragmenting into cube-shaped pieces, sometimes known as "sawdust" or "cubical fracture."
- Having a colour of white, yellow, or purple or otherwise appearing lighter or darker than the surrounding areas
Push a screwdriver against the area if you think it's rotting. Wood rot can be identified by how easily an object can be sunk into the surface.
Holes Or Cracks
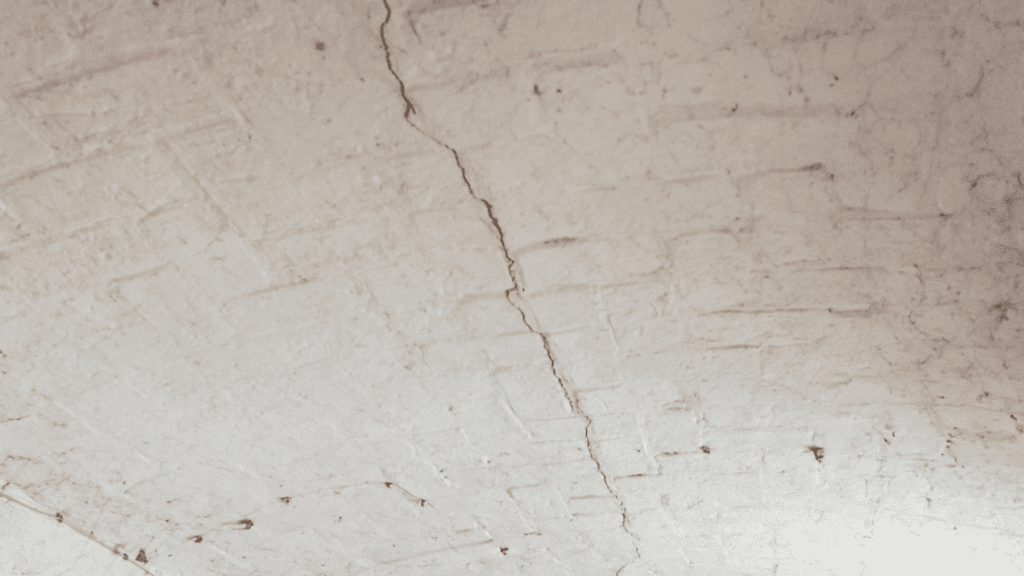
Although water damage can cause plaster difficulties like holes, cracks, and missing pieces, these are more often the result of other problems like house settling or pest infestations.
Cracks and holes in the structure are dangerous because of the potential for structural collapse, but they can also be costly since air can escape through the spaces between levels. Your utility costs will rise since you are heating air not used on the floors and walls.
Warping And Sagging
Has the centre of your ceiling sagged so that it curves downward? Do any spots look like they're buckling or rippling? What you're seeing is the detachment of your material from its backing. Don't put off maintenance for too long.
Older houses, especially those with plaster, are more susceptible to this problem than newer ones; powerful vibrations, shifting foundations, and even termites can all contribute to the problem. It's usually a red flag for the return of that old foe, too much moisture.
You can't ignore the problem and hope it goes away; instead, you should have a professional take care of ceiling repair and installation.
Do's of Ceiling Repairs
First, let's go over some important ceiling repair dos and don'ts.
Locating The Causes
Locating the origin of the problem is the first and most crucial step in fixing it. Cracks in the ceiling, for instance, should prompt you to investigate the cause of the cracks.
Water stains on the ceiling, for example, can be a dead giveaway that a leak is to blame for the softening and cracking of the joint compound in the ceiling. When the joint compound is applied too liberally, it shrinks and develops cracks as it dries, creating a delicate spider web of hairline fissures.
Fixing the leak that caused the cracks in the ceiling should come before repairing the ceiling itself. You should consult an expert if the problem persists despite your best efforts. You can only move forwards once the underlying issue is fixed.
Only by eradicating the root of the problem can ceiling repairs be made permanent. If you don't fix the issue, it will keep happening, and you'll have to get a new roof.
Popcorn Ceiling Removal Is Being Considered.
Popcorn ceilings were all the rage in the 1962s and 1972s, but today they are typically dust traps, and any crack correction stands out visibly.
The ceiling texture should be removed or covered with drywall or firm foam panels to increase the home's resale value.
It is important to identify the type of popcorn texture on your ceiling before completing repairs, as ceilings with this pattern constructed before 1978 may contain asbestos. Popcorn ceilings containing asbestos should be removed by a professional trained in asbestos remediation.
Surface Preparation
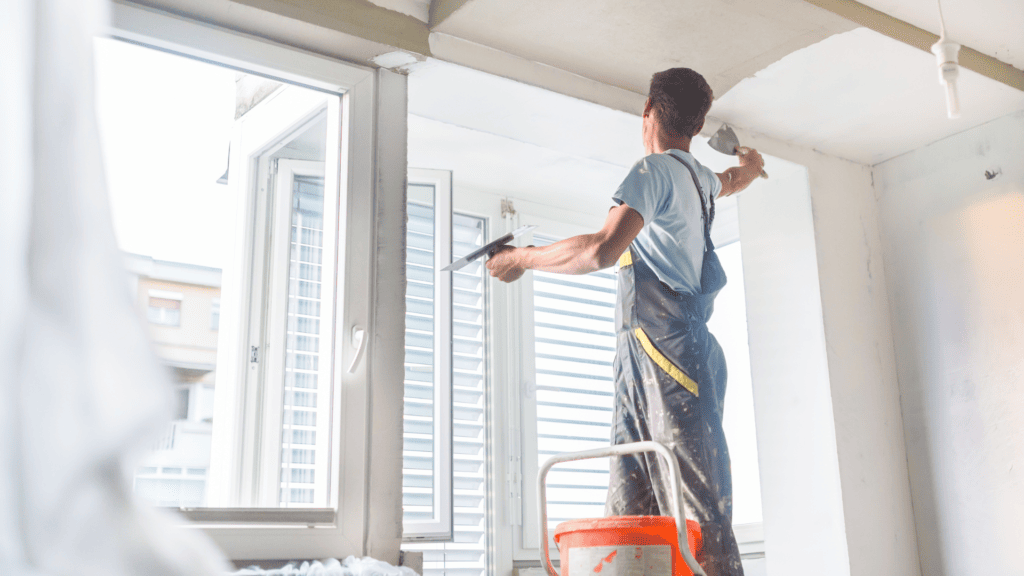
Before applying any repair materials, you should clean the area and remove any flaking paint or disintegrating drywall. Remove loose or broken pieces by carefully scraping them with a putty knife or scraper. This prepares a firm and smooth surface for the repair materials to stick to.
Keeping The Walls And The Ground Safe.
It's important to safeguard the surrounding walls and flooring during ceiling repair. The compound you use to fix the ceiling may begin pouring down the walls and floors. It would help if you prepared to maintain the surrounding walls and flooring. A canvas tarp or other protective covering can be used to cover them. It will aid in keeping the walls and floors clean by preventing splatters from hitting them. This way, you can finish making repairs without additional time cleaning up the debris.
Finishing Off With A Nice Touch.
The replacement and mending must be completed to a high standard. Repairing cracks without giving them a finishing touch would make them look just as awful as they were before. When repairing a ceiling, selecting sealants that blend in with the existing colour scheme is important. It's also important for the final product to be smooth. Using a spray or semi-liquid is also important to achieve a similar consistency. If you don't feel like doing it, there are plenty of reputable ceiling repair services you may call.
Experimenting With A Pliable Repair Compound.
If you've ever patched a hole in the ceiling only to have it resurface weeks or months later, a flexible product may be the answer.
Applying a thin coat of patch with a small brush directly over a crack filled with compound or spackling and then sanding smooth is preferable to using normal paper or mesh drywall tape. Applying just one or two applications of the patch is enough to establish a resilient seal over the patched crack.
Investing In Appropriate Equipment For Ceiling Fixing
If the crack in your ceiling is only a hairline and has been present for some time, you can try repairing it with silicone sealant caulk. A thick layer of this will ensure a reliable barrier against moisture.
When dealing with multiple, deep cracks, the correct equipment and supplies can make all the difference. Tools, such as a taping knife six inches long, are useful for removing peeling paper and loose ceiling texturing.
A little mud will fix drywall holes. After the mixer dries, mesh or paper drywall tape can reinforce the compound, and drywall sanding can smooth the surface.
Smoothing Out The Rough Edges With Sandpaper And Paint
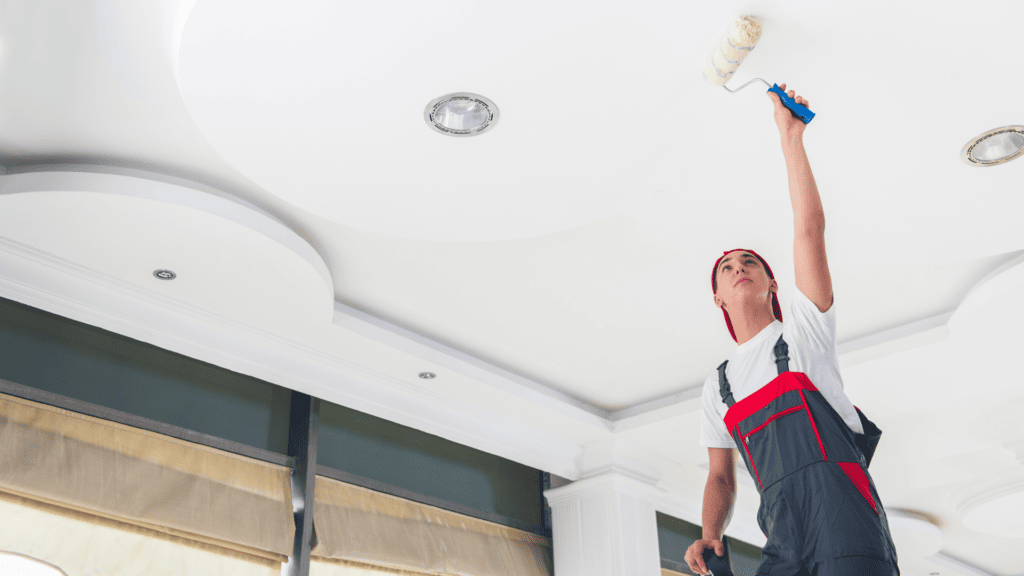
Sandpaper can provide a flawless finish after the repair materials have dried. Gently sanding the mended area will remove any rough edges or flaws. At last, paint it to blend in with the rest of the ceiling and ensure it looks good.
When You Factor In The Price Of Maintenance
Setting aside enough money in your ceiling repair budget is crucial to pay for the necessary supplies and equipment. The ceiling's current state, the size of the crack or room, and the surface roughness are all elements that could affect the final price.
Incorrect Methods for Fixing Ceilings
Let's review everything you shouldn't do while fixing a ceiling.
Continuing Irresponsibly.
People who don't budget and plan for ceiling repairs waste time and money. Therefore, you should guarantee that unexpected difficulties do not arise.
Ceiling repairs may require removing some of the texture to perform the repair and then repairing the ceiling with a substance that matches the rest of its surface. However, this will depend on the ceiling texture type and the fracture's severity.
Instead of just jamming spackle into the crack with your finger (which can work! ), consider whether retexturing or painting the ceiling will be required to complete the repair. Think about the project and the result you want to achieve.
Neglecting Safety As A Priority
Work safely on the ceiling. Use safe ladders and cut off the power if possible. Safety questions? Ask an expert.
Using a dust mask and goggles when sanding drywall compounds is essential. Instead of seats or stools, use a sturdy stepladder to reach the ceiling.
Reducing The Length Of Drying Time.
The drywall compound used to fix cracks in a ceiling must be allowed to dry thoroughly before a new coat is placed.
Your roof's ceiling will need adequate drying time after you've finished fixing it. Take your time because that could affect how long the ceiling dries. Eventually, the issue will rear its ugly head again, which can lead to many difficulties.
The mixture should be applied as thinly as possible, and any excess should be scraped off with a tape knife. The compound will dry to a brilliant white once completely cured. After that, you may sand it down and give it a new coat of paint.
Skipping Routine Checks
Maintaining routine repairs is essential to keep your ceiling in good shape. Inspecting your ceiling frequently, fixing minor issues as soon as they appear, and doing additional maintenance as instructed will help you prevent costly repairs and extend the life of your ceiling.
Not Including Any Other Roof Adjustments.
After fixing the ceiling texture, an old light fixture or rusty return-air vent can damage the new look. Replace the light fixture and repair or clean and paint the vent to make the space look new.

Overcoming Your Limits
Ceilings that have sustained significant water damage or structural difficulties require expert attention. Being honest with yourself about your repair skills and knowledge levels is important. To guarantee correct execution and excellent outcomes, complex projects require the assistance of professionals.
Reducing Safety Measures
Prioritise security whenever working on a ceiling. Don't put yourself in harm's way by working at heights without the right gear or attempting repairs without the knowledge to do so. Ensure you abide by all rules and regulations to keep everyone safe during the repair process.
Conclusion
Ceiling repairs are crucial for maintaining the safety and longevity of your home. To fix ceiling cracks, it is essential to assess the level of damage and inspect the area for obvious symptoms such as cracks, water stains, and sagging. Water damage can cause moisture intrusion symptoms, such as mold, mildew, and water stains. Water damage can be caused by flaking and peeling paint, excess condensation from inadequate ventilation, discolouration from rust and wood deterioration, holes or cracks, warping and sagging, and detachment of material from its backing.
Fixing the leak that caused the cracks in the ceiling should come before repairing the ceiling itself. Consult an expert if the problem persists despite your best efforts. Ceiling repairs can only be made permanent if the root of the problem is fixed. Popcorn ceiling removal is being considered, as it can increase the home's resale value. It is important to identify the type of popcorn texture on your ceiling before completing repairs, as ceilings with this pattern constructed before 1978 may contain asbestos.
In conclusion, ceiling repairs are essential for maintaining the safety and longevity of your home. To address ceiling issues, it is essential to assess the cause, identify the source of the problem, and consult a professional for proper maintenance. Popcorn ceilings containing asbestos should be removed by a professional trained in asbestos remediation. Before applying repair materials, clean the area and remove flaking paint or disintegrating drywall. Keep the surrounding walls and flooring safe by using a canvas tarp or other protective covering. Finish the replacement and mending to a high standard by selecting a flexible repair compound and using a spray or semi-liquid to achieve a smooth consistency.
Invest in appropriate equipment for ceiling fixing, such as a taping knife, drywall tape, and sandpaper to smooth out rough edges. Set aside enough money in your ceiling repair budget to cover the necessary supplies and equipment.
Incorrect methods for fixing ceilings include continuing irresponsibly, neglecting safety, ignoring routine checks, and not including roof adjustments. Work safely on the ceiling, using safe ladders and cutting off power if possible. Allow the drywall compound to dry thoroughly before applying a new coat.
Overcoming your limits is crucial for ceilings that have sustained significant water damage or structural difficulties. Be honest with yourself about your repair skills and knowledge levels, and seek the assistance of professionals for complex projects.
Reducing safety measures is essential, ensuring you don't put yourself in harm's way by working at heights without the right gear or attempting repairs without proper knowledge.
Content Summary
- Ceiling repairs are crucial for the safety and attractiveness of your home.
- Assess the level of damage before starting any repairs.
- Water damage is a common cause of ceiling problems.
- Look out for warning signs such as mould, mildew, and water stains.
- Flaking and peeling paint can also indicate water damage.
- Rust and wood deterioration are signs of moisture damage.
- Soft, spongy, or stringy wood indicates wood rot.
- Holes and cracks can be caused by various factors, including water damage.
- Warping and sagging may be a result of detachment from backing or excess moisture.
- Older houses with plaster are more susceptible to ceiling sagging.
- Locating the cause of the problem is the first step in ceiling repairs.
- Fixing leaks and underlying issues is essential before repairing the ceiling.
- Consider removing popcorn ceilings for better resale value.
- Clean and prepare the area before applying repair materials.
- Protect the surrounding walls and flooring during ceiling repairs.
- Finish the repair with a smooth and well-blended surface.
- Use a flexible repair compound for lasting results.
- Invest in appropriate equipment for ceiling fixing.
- Smooth out rough edges with sandpaper and paint for a flawless finish.
- Budget and plan for ceiling repairs to avoid wasted time and money.
- Don't neglect safety while working on the ceiling.
- Allow sufficient drying time for the repair materials.
- Conduct routine checks to maintain your ceiling in good condition.
- Consider other roof adjustments, like replacing light fixtures or vents.
- Recognize your limits and seek professional help for complex projects.
- Prioritize safety measures during the repair process.
- Regular maintenance is essential for a well-maintained ceiling.
- Ceiling cracks can be fixed with time-honored practices.
- Identify the root cause of ceiling cracks before repair.
- Popcorn ceilings can be outdated and problematic, requiring removal.
- Prepare the surface properly before applying repair materials.
- Protect surrounding walls and floors during ceiling repairs.
- Use suitable sealants that match the existing ceiling.
- Flexible repair compounds can prevent cracks from resurfacing.
- Proper equipment and supplies are necessary for effective ceiling repairs.
- Sanding and painting provide a finishing touch to ceiling repairs.
- Budgeting for repairs helps cover necessary costs.
- Safety should always be a top priority during ceiling repairs.
- Allow sufficient drying time for the repair compound.
- Regular inspections and maintenance prevent costly repairs.
- Consider other aspects like lighting fixtures when repairing the ceiling.
- Know your limits and seek professional help for complex repairs.
- Follow safety regulations and guidelines for a safe repair process.
- Cracks in the ceiling can be caused by various factors.
- Removing popcorn ceilings can increase the home's value.
- Proper surface preparation ensures better repair results.
- Invest in quality equipment for efficient ceiling repairs.
- Sanding and painting give the repaired area a polished look.
- Plan your budget wisely for a successful ceiling repair project.
- Always prioritize safety and follow necessary precautions during repairs.
Frequently Asked Questions About Ceiling
It is not always necessary to repaint the entire ceiling after patching a small area. However, keep in mind that the colour and texture of the patched area may differ slightly from the rest of the ceiling. If the difference is noticeable, repainting the entire ceiling might be the best option for a uniform appearance.
It is recommended to use products specifically designed for ceiling repairs. Regular household products may not provide the necessary durability, adhesion, or finish required for long-lasting results.
Yes, water-damaged ceilings often indicate an underlying issue such as leaks or water infiltration. Consulting a professional can help identify the source of the problem and ensure comprehensive repairs to prevent further damage.
To prevent future ceiling damage, it is important to:
- Address any underlying issues promptly, such as leaks or structural problems.
- Ensure proper ventilation in areas prone to moisture, like bathrooms and kitchens.
- Regularly inspect and maintain the ceiling, looking for signs of cracks, leaks, or sagging.
- Avoid hanging heavy objects directly from the ceiling without proper support.
If you are unsure about a ceiling repair or lack the necessary skills, it is best to consult a professional.


