Do you need advice on how to keep your plastered walls in good condition? Plastering the walls of your home can give it a sleek and sophisticated look. They are beautiful and long-lasting, but only if cared for properly.
If you have recently plastered walls or want to maintain the quality of your current walls, there are a few simple steps you can do to ensure they last as long as possible.
Maintaining the longevity and aesthetic appeal of your plastered walls can be done through routine cleaning and dusting as well as rapid attention to minor repairs.
If you take the time to learn about plastered walls and put in place proper maintenance procedures, you might enjoy their classic beauty for many years to come. In this piece, we'll review some great advice for taking care of your plastered walls so they always look their best.
Advice For Taking Care Of And Maintaining Good Plaster Walls
Installation And Preparation
Plaster walls will last longer and look better if properly prepared and installed. You can improve the look of your area by giving it a clean, faultless finish by following the right steps. Here, we'll go over the fundamentals of getting ready to plaster a wall and then put it up.
- Surface Preparation: It is essential to carefully prepare your wall surface before laying plaster. Then, clean the walls of any existing wallpaper, flaking paint, or other debris. To remove blemishes or rough spots, use a scraper or sandpaper. Make sure it's dust-free, dry, and clean before you start.
- Repairing Damages: Check the walls for damage, such as cracks and holes. Put in new dents and dings before you start plastering. Apply filler or bond compound to any gaps or holes. A professional plasterer should be consulted to repair more substantial holes.
- Applying a Primer: Plastering a wall without first priming is a bad idea. Plaster's ability to adhere to a surface is enhanced by priming, which creates a uniform, smooth surface. Priming walls that have been plastered should be done using a high-quality primer according to the manufacturer's instructions.
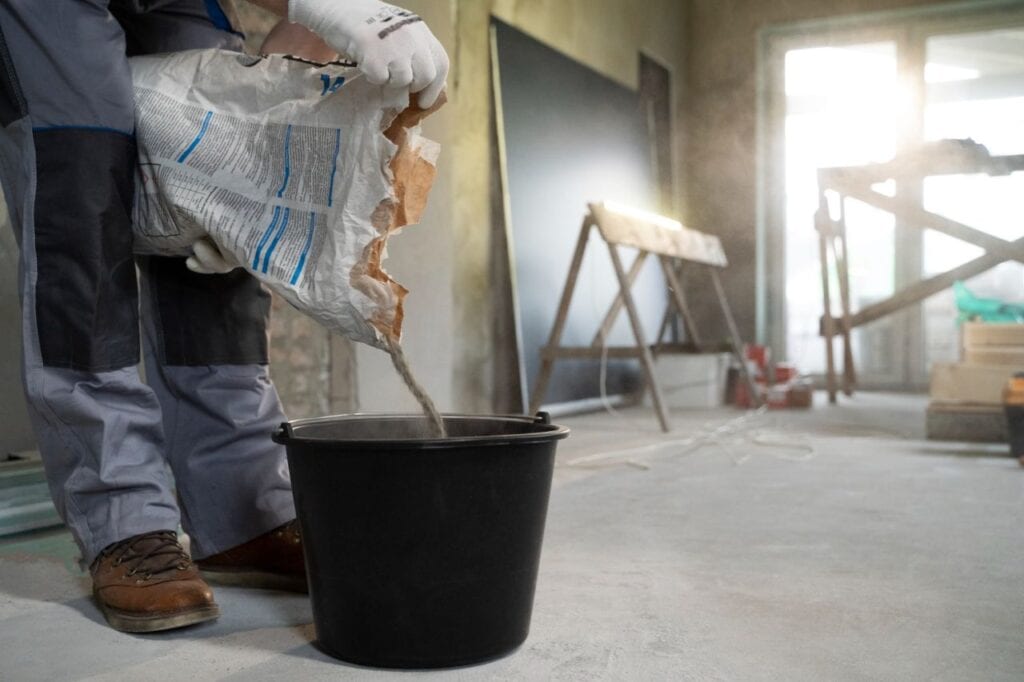
- Mixing the Plaster: Mix the plaster according to the manufacturer's directions, which will vary depending on the variety you're using. Plaster is typically made into a more manageable consistency by adding water. The plaster and water should be combined in a clean bucket and a mixing container and stirred constantly until a smooth consistency is reached.
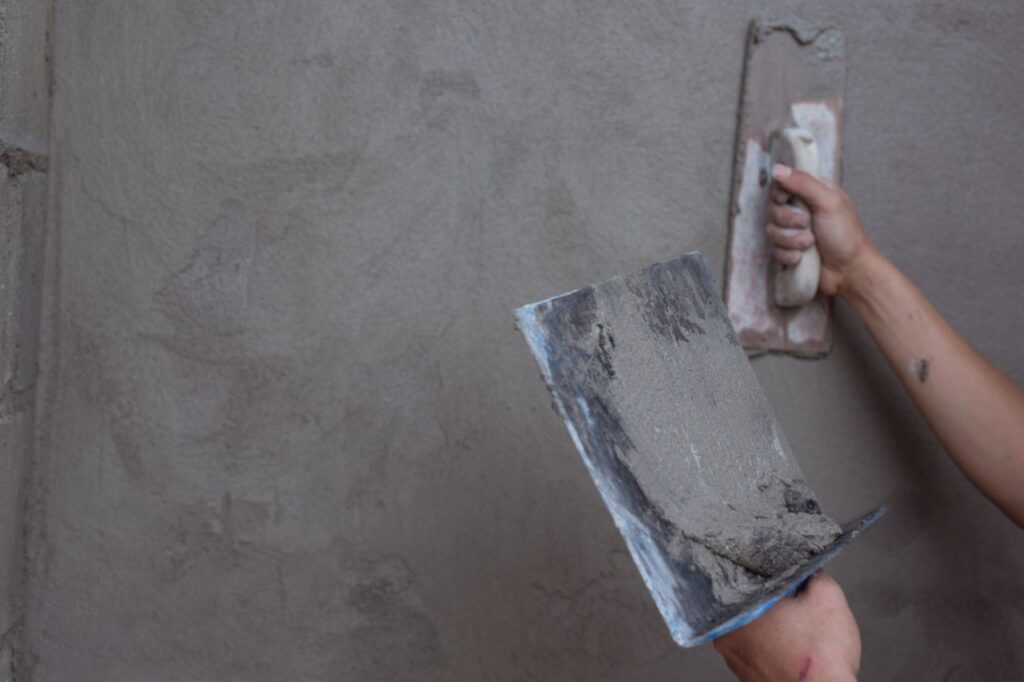
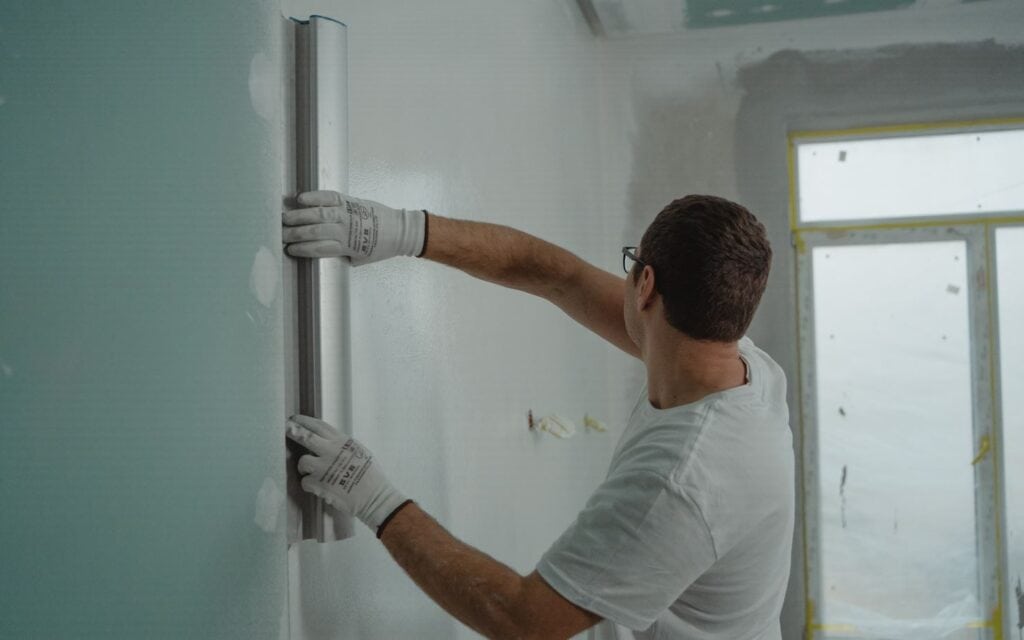
- Applying the Plaster: First, spray water onto the cleaned and primed wall. The plaster will stick better and not dry out as quickly if you do this. Apply a thin, even coat of plaster on the wall with a trowel. Focus on a little area at a time and use upward strokes to achieve a uniform and smooth result. Plaster can easily become cracked or uneven if you work it too much.
- Skim Coating: Once the initial coat of plaster has healed, a skim coat can be applied to refine the surface's smoothness further. The plaster should be thinned out and applied over the first coat. Apply the plaster carefully and smooth down any bumps using a trowel.
- Trowel Finishing: To get the desired finish before applying the skim layer, use a soapy sponge or a plastering trowel. Depending on your preference, you can either produce a smooth, smooth texture or add texture. Do your best to maintain a uniform and consistent appearance while you work.
- Drying and Curing: Dry the plaster completely as directed by the maker. During this time, the plastered surface should not be touched or disturbed to ensure proper drying. For plaster to harden properly, it must dry and cure for the recommended amount of time.
If you follow these instructions, your plastering job will turn out beautifully. If you want your plastered walls to last, you need to take the time to prepare them properly, fix any damage, and apply the plaster. If you want perfect plastered walls, take your time, note every detail, and maybe even hire a pro.
Routine Dusting And Cleaning
Plastered walls need regular cleaning & dusting to keep them looking clean and fresh. Accumulation of dirt and dust over time can degrade the surface's polish and reduce its aesthetic value. You can maintain your plastered walls attracting men with regular dusting and cleaning. Here are some suggestions for keeping your plastered walls dust-free and looking their best.
- Gather the Right Tools: Get everything you need for a successful cleaning session together before you start. A gentle cleaning solution designed for fragile surfaces like plaster, a pail of warm water, and a soft, sticky gunk cloth or feather duster is all you need to get the job done.
- Dusting the Walls: Get rid of dust and cobwebs from the walls first. While dusting, always work from the top down with a soft cloth and feather duster. Scrubbing too harshly or applying too much pressure will ruin the plaster, so be careful. Dust tends to gather in hard-to-reach places, so you should give additional attention to such.
- Cleaning Solution: Plastered walls that require further maintenance than just dusting can be cleaned using a mild detergent and water solution. In a bucket, combine a few drops of gentle dish soap or plaster cleanser with hot water. To protect the plaster, don't use anything too abrasive or chemical. Always perform a spot test before using the cleaning solution on the entire wall.
- Spot Cleaning: A clean towel or sponge dipped into the diluted cleaning agent can remove blemishes or stains from the plastered walls. Don't scrape or rub the affected area. Just blot it gently. The stain will be easier to remove if you let the cleaning solution stay on it for a few minutes before blotting it again with a clean, moist towel.
- Cleaning Technique: Plastered walls require a light touch and minimal wetness for cleaning. Ensure the sponge or cloth is only damp, not soaking wet, by wringing it out completely. The best technique to clean a wall is to start at the top and work down in little pieces. To avoid spreading dirt or grime, use a soft cloth or sponge and light, circular strokes, rinsing it out occasionally in the clean water bucket.
- Drying: Plastered walls must be properly dried after cleaning to avoid water damage. To dry the walls, pat them gently with a fresh, lint-free towel or a soft, dry cloth. Please don't use too much pressure or rub the plaster, as doing so may harm or leave stains.
- Regular Maintenance: Plastered walls need regular cleaning & dusting to maintain their best appearance. If you want to keep the dust and filth from collecting on the walls, you should dust them at least every week. To avoid them being permanently embedded, stains and marks should be cleaned as soon as possible after discovery.
Keep your plastered walls fresh and new by following these cleaning and dusting guidelines. Be careful not to scratch the plaster by using harsh cleaners or abrasive materials. Plastered walls are an investment, and with proper care, they may be a design feature for many years.
Avoid Using Harmful Materials
Plastered walls require special care, including the avoidance of solvents. Plaster can be discoloured, deteriorated, or even structurally compromised by harsh cleaning solutions. If you want your plastered walls to endure long and look good, here are some steps you can take to prevent using harmful chemicals.
- Choose Mild Cleaning Agents: Use moderate, nonabrasive cleaning products for soft surfaces like plaster rather than strong chemical cleansers. Check the labels to make sure the product is suitable to be applied to plastered surfaces. These gentle cleansers can eliminate grime and debris without harming the surface they're used on.
- Read Product Labels: Always read all warnings and directions before using cleaning products. Check for caution and warnings to ensure the product may be used on plastered walls. Use the manufacturer-recommended dilution rates and application techniques.
- Test in an Inconspicuous Area: You can evaluate a cleaning product's safety for your plastered walls by using it on a small, hidden area first. Test the cleaner on a hidden area to see whether it causes any discolouration or damage to the surface. Apply the cleaner to the rest of the wall if there are no adverse responses.
- Use Gentle Cleaning Methods: Use non-abrasive cleaning procedures that reduce the necessity of harsh chemicals while cleaning plastered walls. Then, use a clean microfiber or feather duster routinely to dust the walls and remove debris. Light stains and markings can be cleaned with a damp sponge or cloth and some plain water or even a mild soap solution.
- Natural Cleaning Alternatives: You should consider eco-friendly cleaning options that won't damage your plaster walls. Plaster can be cleaned effectively and safely with hot water and vinegar, for instance. A paste made from baking soda and water can be used as a mild abrasive cleaning.
- Preventive Measures: Preventative actions are one of the most effective methods of reducing the use of toxic chemicals. Reduce the accumulation of dust and grime by dusting the walls frequently, cleaning up any spills or stains immediately, and maintaining a clean environment. Preventative actions can reduce the time spent cleaning and the amount of harsh chemicals used.
While cleaning your plaster walls, remember that mild products and practices are essential for their preservation. Plastered walls can keep their strength and look for a long time if harsh chemicals are avoided.
Minimal Damage Repair
Plastered walls are susceptible to minor deterioration, including hairline cracks and small dents. Maintaining the structural stability of your walls requires timely attention to these problems. If your plaster walls have suffered minor damage, you can fix it by following these steps:
- Assess the Damage: Then, you should do a careful inspection of the wall to look for any little cracks or holes. Check for dings, chips, and cracks the size of a hair. Please choose the best repair strategy based on their size, location, & severity.
- Prepare the Area: Clean up the damaged area and remove anything that could get in the way before continuing the repair. Make sure the area is free of dust and debris by gently cleaning it with a brush or soft cloth.
- Fill in Cracks and Holes: Use fine-grit sandpaper to even out the edges of any cracks or holes that are only visible up close. This prepares a smooth area for applying the patch. Then, using the putty knife or a little trowel, spread a thin coating of joint compound with plaster filler over the area. Please make sure the cement or filler is in line with the surrounding medium and smooth it over the damaged area. Please follow the manufacturer's drying time recommendations.
- Sand and Blend: Sand the mended area gently with fine-grit sandpaper once the repair compound has dried. This aids in producing a sleek and unbroken final product. Integrate the patchwork into the surrounding wall so there are no obvious lines or changes in texture.
- Prime and Paint: Priming the patched area after sanding is a good idea. Priming aids in sealing the damaged surface and laying down a good paint foundation. After the primer has healed, the damaged area can be painted to blend in with the rest of the wall. If you are unclear on matching colours properly, use paint with the identical type and hue, or hire a professional.
- Feathering Technique: Feathering is used to restore bigger damaged areas, including dents or chipped plaster. Joint cement or filler should first be applied thinly over the injured area. Then, feather the borders to smooth the transition as you progressively expand the overlay beyond the nearby vicinity. This method makes it possible to conceal the repair within the wall's texture.
- Drying and Finishing: Please wait until the area is entirely dry before continuing. After the patch has dried, a light sanding will help smooth down any rough spots. Remove any dirt or debris and prep the surface for priming and painting as described above.
Following these instructions, you should be able to patch up any small holes in your freshly plastered walls. If you take care of these problems immediately, you can keep your walls looking good and functioning well. Take time applying and combining the repair products for the best possible results.
Coping With Serious Damages
Major damage, like big cracks or structural difficulties, can occur to plastered walls. The stability and security of your walls depend on your attending to these issues without delay. In the event of significant damage to your plastered walls, follow these steps:
- Assess the Extent of the Damage: To determine how extensive the damage is, you need first perform a careful inspection of the affected area. Take note of any major damage, such as cracks, sagging, or bulging areas. If you want to fix the problem permanently, you need to find out what caused it in the first place, whether it be a faulty foundation or water leaks.
- Seek Professional Assistance: In many cases, a professional plasterer and contractor's services are required to repair extensive damage to plastered walls. They can diagnose accurately and provide sound advice for fixing the problem. Get in touch with an expert to assess the situation and offer advice.
- Reinforce the Structure: Further structural reinforcing may be required, depending on the extent of the damage. Fixing the problem can include bracing, beams, or other structural parts. It is advisable to have a professional assess the situation and make any necessary repairs.
- Repairing Cracks and Structural Issues: It is essential to quickly and properly repair any major fissures or structural difficulties. To get to the underlying structure, it may be necessary to remove the damaged plaster inside the afflicted area. Plaster can be reapplied, reinforcement mesh can be used, or structural adhesives can be used to restore the damaged area. In these cases, it's crucial to abide by the advice of an expert to guarantee an appropriate outcome.
Avoiding Mould And Moisture
Plastered walls can lose their strength and look mould if there is too much moisture in the air. Keep your plaster walls dry & mould-free by following these steps to avoid problems caused by excess moisture:
- Ensure Proper Ventilation: A well-ventilated home maintains a healthy relative humidity. Make sure that spaces with plastered walls, such as bathrooms & kitchens, have proper air circulation to prevent mould and mildew growth. Showering and cooking generate a lot of steam, so use a ventilation system or large windows during these times.
- Promptly Address Water Leaks: Dampness and moisture issues in walls are often the result of water leaks. Water stains and discolouration are telltale symptoms of flood damage or leakage and should be attended to immediately. To stop the plaster from crumbling any further, you should locate the leak and have it fixed. This could be a plumbing problem or an issue with the building's shell.
- Control Indoor Humidity: Keep the humidity level in the house comfortable. In high-humidity places or during humid seasons, dehumidifiers should be used. Check the humidity with a hygrometer & take corrective action if it rises above the optimal range (about 30–50%).
- Regularly Inspect for Mould: Walls that have been plastered should be checked frequently for mould. Inspect the area for mould, musty odours, and discolouration. If you see mould, act fast and have it removed by a professional. They will determine how extensive the mould growth is, eliminate it safely, and implement measures to prevent further mould issues.
- Keep Walls Dry: If your walls are plastered, keep moisture away. Any water splashed on the walls should be wiped off immediately. Condensation here on walls indicates a need for better ventilation and insulation to prevent further moisture accumulation.
Protect your plastered surfaces from damage and mould growth by following these precautions and fixing any moisture problems as soon as possible. The longevity and attractiveness of our plastered walls depend on your attention to preserving a dry and very well atmosphere.
Frequently Asked Questions About Plastering
It is recommended to clean your plastered walls at least once every three to six months, depending on the level of dust and dirt accumulation.
No, it's important to use mild and non-abrasive cleaning agents specifically formulated for plastered surfaces to avoid damaging the plaster.
Proper ventilation and promptly addressing water leaks are key to preventing excessive moisture and mould growth on plastered walls.
For minor cracks, you can use fine-grit sandpaper and joint compound to repair them. However, for major cracks, it is best to seek professional assistance.
To protect your plastered walls from damage, use felt pads or rubber bumpers on the bottom of furniture pieces and avoid dragging or bumping furniture against the walls.
Repainting And Retouching
Plastered walls are susceptible to small flaws and damage over time. Retouching and repainting are viable options for keeping their visual attractiveness intact. Here are some pointers for patching and painting over freshly plastered walls:
- Surface Preparation: Make sure the wall surface is free of dust, filth, and loose debris before doing any touch-ups or repainting. To wipe away dust and dirt, use a microfiber cloth or a light brush. If cleaning is required, use mild water and detergent to wash the walls, followed by thorough rinsing and drying.
- Colour Matching: The paint colour must be matched as nearly as possible if you intend on touching up a tiny section or a specific region. Using the paintwork or taking a sample to a paint store for a colour match are both viable options. Consider the existing paint's age and the lighting in the room, both of which might alter how the colours appear.
- Retouching Techniques: Use a tiny brush or even a cotton swab, so apply paint sparingly when touching up tiny spots. Apply a thin coat first and wait to dry before judging the coverage. Apply extra coats as necessary to get a uniform colour throughout the area. Blend the repaired region into the surrounding pixels by gently feathering the edges.
- Repainting the Entire Wall: Priming the wall is the first step in painting over the full surface. Priming prepares the surface for a new coat of paint by making it smooth and homogeneous. Choose a primer designed on plastered walls and apply it as directed.
- Choosing the Right Paint: Choose paint made for plastered walls and is of a good grade. Think of details like the colour scheme and prefered finish (matte, satin, or gloss). Use a latex paint, or one made especially for plaster if you want the best results. Get advice from experts at a paint store on what will work best for your project.
- Painting Techniques: Start painting the wall at the top and do it in little parts as you move down. Apply the paint with a roller to larger surfaces and a brush to smaller, more detailed areas. Use lengthy, overlapping strokes to apply the paint uniformly and smoothly. Make sure the paint is evenly applied without drying out or overlapping by taking breaks between sections.
- Drying and Second Coat: If a second coat of paint is necessary, wait for the previous one to dry completely. Drying durations between coats should be adhered to as specified by the manufacturer. If you're changing colours or trying to hide flaws from a prior application, applying a one-second coat is a good idea.
Avoiding Cracks
Plastered walls must be protected from cracking to maintain structural and aesthetic integrity. The occurrence of cracks can be avoided by following these guidelines.
- Proper Installation: When setting up, apply the plaster properly. When applying, curing, and preparing plaster, use the proper methods and procedures. Inadequate installation might increase the likelihood of cracks and weak places.
- Structural Stability: Fix the foundational concerns that could cause the walls to collapse. Verify that there are no major shifts or settling in the building's foundation. If you see any cracks in the plaster or other structural issues, it's best to call in the experts.
- Avoid Temperature Extremes: Plaster can crack due to expansion and contraction brought on by extreme temperature changes. Keep the interior at a consistent temperature and shield the walls from direct sunlight or icy draughts.
- Proper Humidity Control: Plaster's durability is reduced by high humidity, which can cause fissures. Reduce interior humidity to prevent wall damage from condensation. Humidity levels can be controlled with the help of dehumidifiers or ventilation systems.
- Avoid Heavy Impact: Plaster walls can easily crack if tension is applied by hanging heavy items. If you don't want to put undue stress on one spot, it's important to use proper mounting hardware and spread the weight.
- Regular Maintenance: Walls should be checked frequently for deterioration and cracks. Don't let tiny fissures or blemishes grow into bigger problems; fix them immediately. Maintain the condition of the walls with regular cleaning and dusting.
The beauty and longevity of your plastered walls can be preserved by following these guidelines for touch-ups, repainting, and crack prevention. Your walls will continue to be a design focus point so long as you keep up with routine maintenance and make repairs as soon as they are needed.
Sharp Items Must Be Avoided
While caring for plastered walls, it's crucial to avoid scratching or denting them with sharp items. Damage to the plaster's surface by sharp things, such as scratches or punctures, can diminish its aesthetic value. These are some safety reminders to keep sharp items away from freshly painted walls:
- Be Mindful of Cleaning Tools: Choose soft, non-abrasive cleaning instruments to use on your walls. It would help to not scratch or pierce the plaster with sharp or abrasive instruments or materials. Use gentle cleaning tools like foam rollers, sponges, and brushes with softer bristles.
- Exercise Caution During Renovations: Take care when using power tools or demolition hammers near plastered walls during renovations or repairs. Drop cloths and plastic sheeting can prevent walls from being nicked or dented by sharp and heavy objects.
- Take Care with Artwork and Decorations: Do not damage the wall's plaster when hanging pictures or other decorations. Utilise picture hooks and adhesive hooks, both of which are designed to prevent unnecessary harm to the wall. Never strike plaster with a nail or other sharp item.
- Children and Pets: Be sure your children and pets are safe from harm before you plaster the walls in your home. To avoid scratches and dents, keep sharp toys and objects out of the way of walls and childproof the lowest parts of the walls. Keep an eye on the kids and show them how to be careful near the walls.
Defending Against Furniture
Plaster walls can be accidentally damaged by furniture if they are not shielded. The following are some suggestions for preventing damage to freshly plastered walls from furniture:
- Use Furniture Pads or Bumpers: Put felt or rubber bumpers on the legs of any furniture touching a wall. As items are moved or rearranged, these bumpers and pads provide a cushioning barrier that protects walls, floors, and other surfaces from scratches, dents, and scuffs.
- Lift and Move Furniture with Care: While shifting or moving furniture, don't drag or bump it into the walls. Instead of dragging or pushing the heavy furniture across the floor, lift it. If you need assistance, ask for it so your move goes as smoothly and safely as possible.
- Maintain Adequate Clearance: Avoid bumping into anything by not leaving enough space between furniture and walls. Furniture is less likely to lean against the freshly painted walls, and there is more room for dusting and mopping.
- Secure Heavy Furniture: Wall anchors and furniture straps can safely fasten big or hefty furniture to the wall. This added support keeps the furniture from toppling over or colliding with the wall, which could cause costly repairs.
- Regularly Inspect and Adjust: Inspect the placement of your furniture regularly and look for indicators that it has made contact with walls. Make any required adjustments to the placement of your furniture to ensure adequate clearance and to prevent undue stress on the wall's plaster.
You can keep your plastered walls looking brand new longer if you avoid damaging them with sharp tools and take measures to prevent scratches from the furniture. Your walls, already in great shape thanks to these preventative measures, will continue to look great and add value to your home or business for years.
Improving Wall Durability
Plastered walls need to have their durability increased to ensure they last a long time and can sustain normal use. Here are some ways to make your plastered walls endure longer:
- Apply a Protective Sealant or Wax: If your walls are plastered, you may want to protect them with a sealer or wax. These items form a protective layer that prevents water, stains, and scratching to the plaster. It is important to test a small part of the plastered surface before applying any sealer or wax.
- Regular Cleaning and Maintenance: Maintaining your plastered walls in pristine condition requires a regular maintenance and cleaning schedule. Maintain a routine of dusting the walls with a clean cloth or feather duster. Take care of spills and stains immediately so they don't set in and become impossible to remove. Keep the area clean to prevent dirt and grime from scratching the plaster.
- Avoid Excessive Moisture Exposure: Plaster walls are not as resistant to moisture as they should be. Avoid extended exposure to moisture by taking precautions like keeping humidity levels down and fixing any leaks or condensation at once. Humidity can be reduced by increasing ventilation in damp places like bathrooms and kitchens.
- Minimise Impact from Sharp Objects: Plastered walls are easily damaged, so use care while arranging or relocating nearby things. To avoid accidental wall damage, keep sharp objects out of the way of walls and cover furniture with padding or bumpers.
- Preventative Measures for Cracks: Protect your plastered walls from cracking by taking the necessary precautions. Check for cracks in the foundation to see whether your home is shifting or settling. Walls that have recently been plastered may crack if you hang something too heavy on them. Walls should be checked regularly for cracks and other structural problems and, when found, immediately addressed.
Getting Professional Help
To guarantee the correct care and upkeep of plastered walls, it may be essential to consult a specialist. When you might want to think about getting outside help:
- Assessing Structural Integrity: A professional plasterer and contractor should be called if you find signs of serious structural concerns or damage on your plastered walls. They'll be able to evaluate the walls' stability, pinpoint the causes of any problems, and propose solutions.
- Major Repairs or Restoration: Professional assistance is required for any large plaster wall repair or restoration. Experts have the know-how, experience, and equipment to repair or restore walls without compromising their structural integrity or visual appeal.
- Expert Advice and Guidance: Plastered walls are common construction material, and professionals have a wealth of expertise working with them. They're a great resource for learning how to keep your walls looking great for as long as possible. Making good judgments is difficult, but getting expert advice can help.
- Complex Finishes or Customisations: Plastered walls can be customised and finished intricately with the help of specialists who have access to specialised techniques and knowledge in this area. They can improve the look of your walls by making them more interesting by adding textures, decorations, or finishes.
The plastered walls of your home deserve the best care possible, and you can get that by enlisting professional help. Repairs and advice from professionals are the best way to ensure that your walls last and look the way you want them to.
Conclusion
Dehumidifiers and hygrometers can help you maintain a comfortable level of humidity within your home. Keep walls dry and do routine checks for mould to prevent additional damage. Maintaining the aesthetic attractiveness of plastered walls requires regular touch-ups and repainting. Surface cleaning, colour matching, painting methods, priming, crack prevention, correct installation, structural stability, handling of severe temperatures, humidity control, and strong impact are all required. Checking for damage and cracks on a regular basis is crucial, as is taking care not to scratch or dent the plaster.
Take care when cleaning up after home improvements and repairs. Avoid damaging the wall by using sticky hooks or picture hooks. Plaster walls, while beautiful and durable, require regular care and repairs to keep them looking their best. Make sure your kids and dogs are safe by moving sharp toys and objects out of the way and childproofing the walls at the floor level before you start plastering. Watch the kids and show them how to be safe around the fences.
Use furniture pads or bumpers to prevent damage to your freshly plastered walls, lift and move furniture carefully, provide enough space around pieces, and use wall anchors and straps to safely fasten heavier pieces. It's important to check on the walls and rearrange the furnishings on a regular basis to keep them in good condition.
Long-lasting plastered walls are impossible without enhancing their durability. Use a sealer or wax to prevent damage, clean and maintain it often, keep it dry, avoid dropping heavy objects on it, and keep sharp objects to a minimum. Look for foundation cracks to determine if your house is settling.
If you need help with building code compliance, extensive repairs or restoration, knowledgeable guidance, or specialised finishes or adaptations, it's best to talk to a professional plasterer and contractor. They have the skills, tools, and expertise to fix or rebuild walls without sacrificing its strength or aesthetic value. If you want your plastered walls to last and look great for a long time, it's a good idea to get some professional advice and direction.
Content Summary
- Plastering the walls of your home can give it a sleek and sophisticated look.
- Proper maintenance is essential for the longevity and aesthetic appeal of plastered walls.
- Careful surface preparation is crucial before laying plaster.
- Repair any damages, such as cracks and holes before plastering.
- Applying a primer before plastering enhances adhesion and creates a smooth surface.
- Follow the manufacturer's instructions for mixing the plaster.
- Apply a thin, even coat of plaster on the wall with upward strokes for a smooth result.
- Skim coating can be applied to refine the surface's smoothness.
- Use a soapy sponge or trowel for trowel finishing to achieve the desired texture.
- Allow the plaster to dry and cure for the recommended amount of time.
- Routine cleaning and dusting are necessary to maintain the plastered walls' appearance.
- Gather the right tools before starting the cleaning process.
- Dust the walls from top to bottom with a soft cloth and feather duster.
- Use a mild detergent and water solution for cleaning plastered walls.
- Spot clean stains with a clean towel or sponge dipped in a diluted cleaning agent.
- Use a light touch and minimal wetness when cleaning plastered walls.
- Proper drying of plastered walls is essential after cleaning.
- Regular cleaning and dusting are necessary to maintain the best appearance of plastered walls.
- Avoid using harsh cleaning solutions that can damage plastered walls.
- Read product labels and choose mild cleaning agents suitable for plastered surfaces.
- Test cleaning products in an inconspicuous area before applying to the entire wall.
- Use gentle cleaning methods and natural alternatives like hot water and vinegar.
- Take preventive measures to reduce the use of toxic chemicals on plastered walls.
- Minor damages to plastered walls, like hairline cracks and small dents, can be repaired.
- Assess the damage and choose the appropriate repair strategy.
- Prepare the damaged area by cleaning it and filling in cracks and holes with plaster filler.
- Sand and blend the repaired area for a smooth finish.
- Prime and paint the patched area to blend with the rest of the wall.
- The feathering technique can be used for larger damaged areas.
- Promptly repair major cracks and structural issues in plastered walls.
- Seek professional assistance for extensive damage to plastered walls.
- Reinforce the structure if necessary for proper wall repair.
- Remove damaged plaster and apply new plaster, reinforcement mesh, or structural adhesives for major repairs.
- Prevent excessive moisture to avoid damage and mould growth on plastered walls.
- Ensure proper ventilation in areas with plastered walls.
- Address water leaks promptly to prevent moisture-related damage.
- Control indoor humidity levels to protect plastered walls.
- Regularly inspect plastered walls for mould and musty odours.
- Keep plastered walls dry by wiping off any water splashes immediately.
- Properly seal and wax plastered walls for added protection.
- Prepare the wall surface by cleaning it before retouching or repainting.
- Match the paint colour as closely as possible for touch-ups.
- Use small brushes or cotton swabs for precise paint application.
- Prime the wall before repainting the entire surface.
- Choose high-quality paint made for plastered walls.
- Use proper painting techniques like starting from the top and working in small sections.
- Allow sufficient drying time between coats of paint.
- Avoid scratching or denting plastered walls with sharp objects.
- Use furniture pads or bumpers to protect walls from furniture damage.
- Consult professionals for assessing structural integrity, major repairs, or complex finishes on plastered walls.

