Customers frequently enquire as to whether or not they can use our plasters in their shower stalls.
One of the most difficult aspects of plaster finishing is unquestionably applying stuccos to showers.
There are a lot of problems that arise from it, but there aren't that many ways to fix them. Keep reading to find out how to use shower plasters to get the best, longest-lasting results.
What is Venetian Plaster?
The art of decorating with Venetian plaster dates back to the 16th century and was developed in the Italian city of Venice. It is a form of plaster used to imitate the look of marble or other natural stones on walls and ceilings. Marble dust, slaked lime, and water are combined to create Venetian plaster, which is then spread in multiple thin coats with a trowel.
There are a number of steps involved in putting Venetian plaster.
Primers are used after the surface to be covered has been cleansed and prepped.
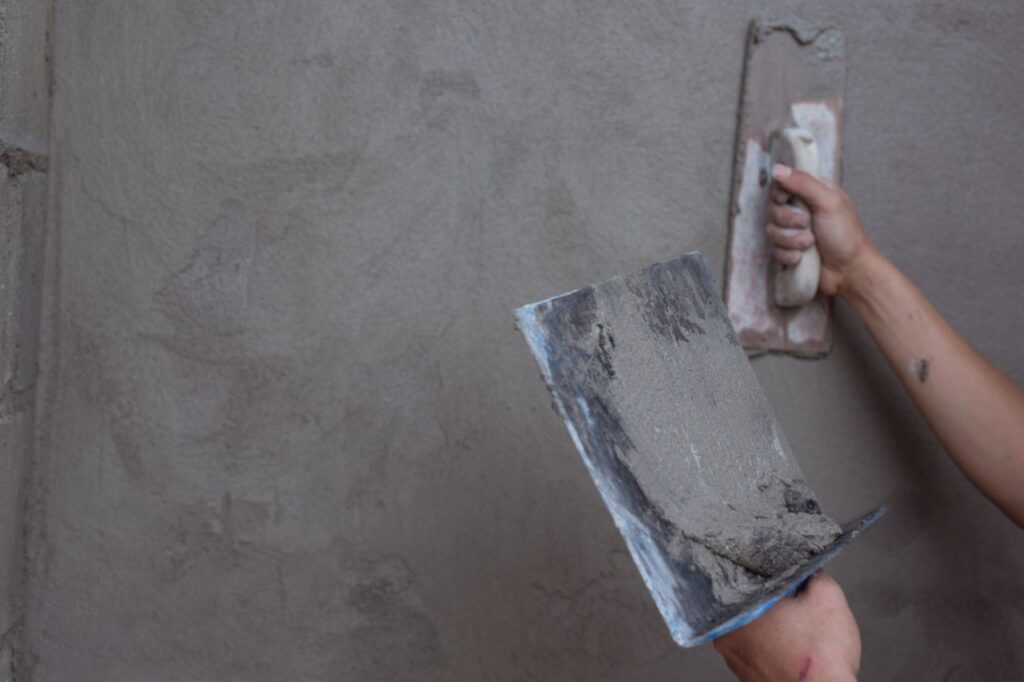
The plaster is then spread out evenly in thin layers and smoothed with a trowel between each application.
The surface is sanded to a smooth finish after multiple coats have been applied, and then it is polished with a fine-grit abrasive to get a glossy, reflective appearance.
The finished product is a high-end, sumptuous coating that is both long-lasting and aesthetically pleasing.
Many colour combinations are possible since Venetian plaster can be dyed.
It's a flexible building material that may be utilised for a variety of purposes, including walls, ceilings, columns, and more.
Yet, a beautiful finish with Venetian plaster takes the expertise of a professional worker.
Since it is more costly than regular plaster or paint, it is typically reserved for more affluent residential and commercial settings.
Venetian plaster has risen in popularity in recent years as a go-to material for decorators and homeowners looking to elevate the look of their rooms.
Those who value the aesthetic value of natural materials and skilled craftsmanship will find Venetian plaster to be a classic alternative due to its distinctive texture, range of colour options, and durability.
A Worthy Challenge
Natural lime-based plasters can be easily applied inside showers to transform a standard bathroom into a high-end, glamorous space.
Elegant and eco-friendly options for shower box finishes include Marmorino Venetian Plaster, Tadelakt, and Pastellone.
However, damp builds up in shower stalls due to everyday water flows and poor air circulation.
Wet marks and mould quickly become permanent when natural lime-based plasters are used on shower walls.
But after years of applying plaster in steam rooms and showers, we've figured out how to overcome all the major obstacles.
We'll show you, step-by-step, how to plaster a shower so that it lasts a long time and looks great.
Why should a bathroom have Venetian plaster?
So, to answer our opening question, yes, many smooth plasters are suitable for use in a bathroom. The reason is good. Polished plaster is not only beautiful to look at, but it also has a number of significant advantages.
First of all, Venetian plaster doesn't have grout, so it's great if you want something that doesn't need much care every day.
Second, this plaster is made with lime instead of cement, which makes it less likely to crack and shrink. Most likely, this is why a "lifetime finish" is what people call Venetian polished plaster. A great tip is to coat Venetian plaster walls with wax. It helps keep dirt and dust away.
The plaster also has antibacterial and antifungal properties because it is made from lime with a high pH.
It is also permeable, which means it can control humidity and stop fungus or mould from growing within the wall finish.
It can handle rising damp and gets rid of any water it takes in very quickly. All of these are very good reasons why polished plaster should be used in a bathroom.
Top Bathroom Applications for Venetian Plaster
Bathrooms can benefit greatly from this eye-catching treatment, which can be applied to anything from white Venetian plaster walls to dramatic metallic accents. Consider a few of the most well-known examples.
Spatulato

A bathroom's reflective light is always an advantage.
Spatulato's high gloss finish and silky texture reflect light in countless ways, creating a subtle shift in colour values that must be observed to be believed.
Spatulato is also highly durable and resistant to water, making it an excellent choice for wet environments like bathrooms.
There is an abundance of colour options and surface treatments, so you may select the one that best complements your ideal.
Travertine
Its Venetian plaster finish mimics the look of actual travertine stone and is painted in a single colour before being ripped and shined.
The end result has a rough feel, just like the stunning natural stone from which it takes its name.
A bathroom with a wall composed of polished travertine plaster might have the look and feel of a modern, natural stone bathroom.
Marmorino
Marmorino has the finest bathrooms available.
This finish is ideal if you want your walls to look like they were made of white Venetian plaster but were actually made of Istrian stone.
There is a wide variety of colours available, so you may pick one that appeals to you the most.
Matte, satin, and glossy surfaces are all available for your choosing. In spite of the laborious process required to get the polished plaster impression, the end result is really nothing short of breathtaking.
Stencil
Stencil-polished plaster is the best approach to expressing your individuality since it allows you to make something truly one-of-a-kind.
An expert in Venetian plastering will work directly with you to produce the look you envision for your space, a process that requires a high degree of artistic skill and attention to detail.
Make a shower-resistant plaster substrate
It is essential to establish a resilient yet flexible plaster foundation before applying stuccos to the walls of the shower. The stucco won't crack if you do this. Why and how, shall we see?
Plastering over a waterproofing membrane
To begin, a waterproofing membrane must be installed over the shower's substrate in some jurisdictions.
The membrane's finish is often rubbery and pliable. Yet, these membranes are better suited for use with tiles than they are with plaster.
Plasters are too brittle to be put directly on such a porous surface without cracking.
It doesn't even help to cover it with a coat of fibrous sticky plaster before applying the stucco.
This is due to the fact that the knobs on the shower box's faucet are a common failure area. A ring is used to apply substantial pressure to the wall when the handles are being installed.
The plaster crumbles and cracks around the handles because of the strain. Also, if the plaster finish isn't thick enough, cracks can appear all over the walls.
The quickest way to fix this is to plaster the entire inside of the shower with fibre-reinforced plaster.
After the fibre-reinforced plaster has dried, a polyester or fibreglass mesh should be applied over the faucet and tap handle region and secured in place using the same material.
Apply the very same netting to the whole shower wall and fix it with the fiber plaster once the second coat has dried.
So when the third and final coat of stucco is dry, you may begin applying it to the walls of the shower enclosure.
Plastering tile surfaces
Plaster can be used to cover up damaged tiles on shower or bathroom walls. Applying stucco to tiled shower walls requires first creating a flat, grippy surface. To make a smooth, even floor, it's necessary to fill up the spaces between the tiles.
When the water in most substrate plasters evaporates, the plaster contracts and leaves holes unfilled.
In this instance, a non-shrinking, adhering substrate plaster, such Gap levelling plaster, should be used to cover the tiled wall (GLP). This plaster does have an exceptional ability to adhere and does not shrink when dry.
In addition, its high adhesion means that surfaces as smooth as marble or tiles can be used as a substrate layer without being sanded first. To prepare the tiles for the treatment, simply wipe them clean.
But, if you don't have any tiles or waterproofing membranes, you can skip the primer and go straight to your plaster finish.
Shower surface and critical points should be watertight
Second only to actually applying the stucco in the shower box itself, waterproofing is crucial. We have already said that if moisture is allowed to build up within a shower, markings and moulds will quickly form and inflict irreparable damage to your plaster.
That is, unless you know how to select the appropriate waterproofing treatment for your finish. In addition, you should pay special attention to safeguarding regions where water drops tend to conceal or dry slowly. Each one at a time, please.
Select the best finishing treatment for your plaster
The walls of the shower must first be made watertight while still being simple to clean.
Not only may moisture lead to unsightly stains, but dead skin cells and soap residue can breed mould if left alone for too long. Lime plasters, which are great for the outdoors, typically disintegrate in a bathroom with a shower.
This is because they have a harder time drying in the shower than they do in any other room in the house due to the lack of ventilation.
When plaster gets wet for an extended period of time, salts build up on the surface, causing permanent dark stains.
The first is to use a paraffin wax that dissolves in a solvent; this works best after the surface has been treated to be water-repellent. However, this paraffin protection requires multiple applications every few months if you choose to go that route.
Instead, a polyurethane varnish should be used because it protects the finish without altering the colour and, if of high quality, maintains the finish's aesthetic value as well. Utilize two coats of primer that has been watered down by a factor of 1:14.
This process helps the varnish seep deeper into the tiny pores of the plaster. Polyurethane varnishes like PU1C and PU2C should then be applied in many coats.
To ensure good penetration into the plaster's pores, the initial coat should be somewhat more liquid than the manufacturer recommends. Between ten and fifteen percent water is ideal.
Safeguard the tab area and the seal of the shower tray
There are two particularly vulnerable spots in the shower stall. The first is the familiar territory of sink knobs and levers. Lime-based plasters require special attention in the shower to keep water from seeping around the rings of the faucet handles and tap.
Penetration allows it to slide inside the plaster substrate, where it leaves patches near and beneath the handles.
Silicone applied behind the rings of the handles during installation to the wall is a simple solution to this problem. Just filling the ring's upper arch with silicone is adequate.
Make a shadow gap
Second, the seal between the walls as well as the shower tray is a particularly vulnerable area. Plasters applied in showers are particularly susceptible to mould and mildew growth because water and debris tend to pool around the seal.
This will cause major water damage and mould growth.
It is recommended that a shadow gap be made between both the two surfaces before building begins.
To prevent water from pooling at the place where the shower tray and the wall meet, it is vital to construct the shadow gap so that the wall's surface lies inside the tray. Finally, use mold-resistant silicone into the crack in the shadow.
Other common errors
If you want to preserve your plaster finish via paraffin treatment, remember to use a silicone seal first. The silicone will not stick to the paraffin and will eventually flake off. This common blunder is depicted in the image below: paraffin wax was applied to the wall before the shower tray was sealed. Water got through, and the silicone eventually peeled off.
When it comes to the shower tray, we never use a plaster finish.
This is possible, but a proper seal will require meticulously prepping the area around the drainpipe.
Conclusion
The history of Venetian plaster as a decorative art form begins in the 16th century, when it was first practised in the Italian city of Venice. It's a type of plaster that's applied to walls and ceilings to make them look like marble or other natural stones. After the area to be covered has been cleaned and prepared, primers are applied, and the plaster is applied in thin layers and smoothed with a trowel in between coats.
After multiple coats have been applied, the surface is sanded to a smooth finish and polished with a fine-grit abrasive to achieve a glossy, reflective appearance. A simple application of a natural lime-based plaster inside the shower can completely transform a boring bathroom into a luxurious spa-like retreat.
Spatulato is a great option for wet areas like bathrooms because it is long-lasting and resistant to water. You can choose the colour and finish that best suits your taste from among many available options.
Travertine is a Venetian plaster finish that is painted a single colour and then ripped and polished to resemble real travertine stone. Marmorino, a bathroom finish made of Istrian stone that looks like white Venetian plaster, is a high-quality option. Because it permits you to create an item that is truly unique, stencil polished plaster is the best way to express your individuality.
In some areas, the substrate of a shower requires a waterproofing membrane to be installed before plaster can be applied. In some areas, the substrate of a shower must be waterproofed before plaster can be installed on top of it.
The knobs on the shower box's faucet are prone to breaking because of the force used to set them in place.
To address this, a polyester or fiberglass mesh should be fastened over the faucet and tap handle area, and fiber-reinforced plaster should be used to plaster the entire interior of the shower.
Plastering a tiled surface entails smoothing out any bumps and making it more grippy, as well as filling any gaps that may exist between the tiles.
Content Summary
- Customers frequently enquire as to whether or not they can use our plasters in their shower stalls.
- Keep reading to find out how to use shower plasters to get the best, longest-lasting results.
- The art of decorating with Venetian plaster dates back to the 16th century and was developed in the Italian city of Venice.
- Many colour combinations are possible since Venetian plaster can be dyed.
- Yet, a beautiful finish with Venetian plaster takes the expertise of a professional worker.
- Venetian plaster has risen in popularity in recent years as a go-to material for decorators and homeowners looking to elevate the look of their rooms.
- However, damp builds up in shower stalls due to everyday water flows and poor air circulation.
- Wet marks and mould quickly become permanent when natural lime-based plasters are used on shower walls.
- But after years of applying plaster in steam rooms and showers, we've figured out how to overcome all the major obstacles.
- We'll show you, step-by-step, how to plaster a shower so that it lasts a long time and looks great.
- Why should a bathroom have Venetian plaster?
- Most likely, this is why a "lifetime finish" is what people call Venetian polished plaster.
- A great tip is to coat Venetian plaster walls with wax.
- All of these are very good reasons why polished plaster should be used in a bathroom.
- Bathrooms can benefit greatly from this eye-catching treatment, which can be applied to anything from white Venetian plaster walls to dramatic metallic accents.
- A bathroom's reflective light is always an advantage.
- A bathroom with a wall composed of polished travertine plaster might have the look and feel of a modern, natural stone bathroom.
- This finish is ideal if you want your walls to look like they were made of white Venetian plaster but were actually made of Istrian stone.
- Make a shower-resistant plaster substrate It is essential to establish a resilient yet flexible plaster foundation before applying stuccos to the walls of the shower.
- To begin, a waterproofing membrane must be installed over the shower's substrate in some jurisdictions.
- It doesn't even help to cover it with a coat of fibrous sticky plaster before applying the stucco.
- This is due to the fact that the knobs on the shower box's faucet are a common failure area.
- The quickest way to fix this is to plaster the entire inside of the shower with fiber-reinforced plaster.
- Apply the very same netting to the whole shower wall and fix it with the fiber plaster once the second coat has dried.
- So when the third and final coat of stucco is dry, you may begin applying it to the walls of the shower enclosure.
- Plaster can be used to cover up damaged tiles on shower or bathroom walls.
- Applying stucco to tiled shower walls requires first creating a flat, grippy surface.
- But, if you don't have any tiles or waterproofing membranes, you can skip the primer and go straight to your plaster finish.
- The walls of the shower must first be made watertight while still being simple to clean.
- Lime plasters, which are great for the outdoors, typically disintegrate in a bathroom with a shower.
- This process helps the varnish seep deeper into the tiny pores of the plaster.
- Safeguard the tab area and the seal of the shower tray There are two particularly vulnerable spots in the shower stall.
- Other common errors If you want to preserve your plaster finish via paraffin treatment, remember to use a silicone seal first.
Frequently Asked Questions About Plastering
Plastering in the Venetian style (also known as Italian plastering) involves creating a marble-like finish on a surface. The natural look and the illusion of texture and patterns offered by Venetian plaster contribute to its classy and elegant appearance.
Venetian plaster is suitable for use in humid environments, such as bathrooms. However, a protective sealer should be applied to avoid water damage and discoloration.
It takes more than just a few YouTube videos to learn how to apply Venetian plaster like a pro. To get the best results from Venetian plaster, it's best to hire a professional.

