Plaster ceilings are a beautiful and timeless addition to any home, but over time they can become damaged, cracked or even start to sag. If you're facing these issues, don't panic! With the right tools and knowledge, fixing plaster ceilings can be a straightforward and rewarding DIY project.
Who among those who live in older homes doesn't have a ceiling someplace that's cracked or drooping and has to be repaired with plaster? Plaster-and-lath ceilings, in addition to the typical wear and tear that comes with living, are at the mercy of gravity.
They can only withstand a certain number of water leaks and structural movements before they begin to pull away from the structure.
The good news is that even severely damaged plaster ceilings may be repaired and saved from suffering further deterioration.
By injecting glue between the plaster and lath in the areas where the keys (anchors) have been detached over time in many older ceilings, we have been able to repair them properly.
While though variants of this method have been around for quite some time (for example, literature written in the 1920s suggests using liquid sulphur as an adhesive), we make use of contemporary materials that are simple to use and do only minimal harm to sound plaster.
It is feasible to restore the integrity of plaster ceilings so that they can continue to serve their purpose for many more years if you use these approaches and have appropriate tool skills.
In this comprehensive guide on how to fix plaster ceilings introduction, we will cover everything you need to know to repair your plaster ceiling and restore it to its former glory. From assessing the damage to repairing and refinishing your plaster ceiling, we've got you covered.
So, grab your tools, put on some gloves, and let's get started!
Sizing up Plaster Ceilings
Once the issue that caused the ceiling to become loose in the first place has been fixed (for example, a leaking roof or structural modifications), the first step is to evaluate how far the ceiling has moved away from the wall.
Applying light pressure to the surface will let you determine the degree of give between the plaster and the lath. You should be able to feel it move back into place like a piece of a jigsaw puzzle slipping into its appropriate location if all goes well.
If there are broken keys or debris in the way, the plaster will resist sitting, and it will feel and sound "crunchy," similar to cracking eggshells or crushing popcorn. If there are no broken keys or debris in the way, the plaster will sit normally.
Do not try to press it back into place since doing so might cause additional plaster to shatter. Instead, you should merely use the palm of your hand to coax the plaster into place gently.
If the gap is just minimal, for example, between 14 and 1/2 inches, it is possible that the plaster may be successfully reattached since it will typically press back into place until it is flush and flat on the lath. If the plaster is sagging between half an inch and one inch from the lath, there is likely an unacceptable amount of debris (broken keys, years' worth of silt) between the plaster and the lath for the project to be successful.
Determine The Cause Of The Crack
The natural process of age and settling is likely the origin of the majority of the plaster cracks in the ceiling; nevertheless, there may be another concern at play here.
Cracking can be caused by water that is present in the ceiling as well as by additional weight that is placed directly on the ceiling from above.
If the wall is already starting to separate from the structural supports, then there is a significant possibility that water is the cause of the problem.
You will need to figure out what initially caused the damage to your ceiling in order to get started on any kind of repair work on it.
Sometimes it is evident; unattractive yellow stains are a clear symptom of a moisture problem, therefore you would be best served by studying how to restore a ceiling with water damage as an example. In other cases, though, it may not be so obvious. On other occasions, though, it may be rather more difficult.
It is quite likely that the crack in the plaster ceiling was caused by anything purely aesthetic, such as fluctuations in temperature or work done on the ceiling by the homeowner themselves, for example. On the other hand, it is preferable to do research.
Cracks less than one-tenth of an inch wide are often nothing to worry about. Nevertheless, cracks that are more than one tenth of an inch wide can be a warning indication that there may be structural difficulties on the horizon.
In the event that the crack in question runs the length of the wall as well as the ceiling, you will need to investigate the reasons behind wall cracks in order to find a solution to the problem.
You won't be able to think about how to repair a plaster ceiling until you've determined what caused the problem and fixed any problems that arose as a result of your investigation.
Remove the Debris
Reattachment is probably not an option unless you are able to use a vacuum to remove all of this dirt from the top.
Often we find that the worst part of the ceiling has too much debris, and we have to remove this section, reattach the edges, then infill the lost parts with new plaster.
Plaster that is fragile and easily crumbled will not be able to withstand the pressing and drilling that is being done, and this plaster will need to be removed as well.
It is recommended to use a tool with a chisel-edged blade when removing damaged portions of plaster since this will encourage further plaster to fall down. This is especially true in ceilings. (This phenomenon is referred to as the domino delamination effect.)
To prevent this propensity from occuring, our recommendation is that you carefully draw out your repair plan, and then use a sharp utility knife to cut away any sections that do not belong. Use a timber crayon or pencil to make your markings, as a pen will eventually bleed through your paint.
Find The Wood Laths
In order for the glue to successfully attach to anything solid, the holes that you bore to inject the adhesive must be immediately beneath the wood lath and not in the gaps between the lath. If any plaster has been removed or a crack has been dug out for the purpose of repair, then the placements of the lath will be visible.
Yet, with a repair that consists of merely reattachment, locating lath is essentially a matter of hunting and pecking. When the layer of plaster is not excessively thick, it is possible to take a step back and search for ghosts or shadows of the lath that are visible through the final coat.
After you have a good hold on one lath, you can presume that the remainder of the lathing is between 1 1/2 and 2 inches broad and around 1/4 to 1/2 inches apart from one another. If you have an infill region that has to be reattached at its margins, mark for injection sites between one and one and a half and two inches back from the edges.
If you are just going to be reattaching plaster, you should arrange for injection holes to be spaced no more than 6 inches apart every 3 to 4 inches.
Drill Injection Holes
We use a carbide drill bit that is 1/4 inches in diameter to create injection holes. Creating these holes is a task in and of itself, but there is an additional complication in that it is critical to bore just through the injection surface.
For instance, if you are reattaching from the plaster side, you need to bore entirely through the plaster, but you must stop short of the wood lath before continuing on.
If you are reattaching anything from the top down, on the other hand, you will need to drill through the lath but stop short of the plaster. By paying attention to the changing resistance of the materials on the drill bit, it’s possible to develop a feel for these different layers.
Vacuum Again
When you have drilled your injection holes, you will need to vacuum away the debris and drilling dust that was created throughout the process. Plaster that is rather old tends to be pliable; thus, you must take care not to pull it off the ceiling with the vacuum.
Placing your hand close to the hole and supporting the plaster in a gentle manner will allow you to continue using the other hand to suction.
But, you should not try to press the plaster back into its original position. If you leave the space, the vacuum will be able to draw some of the debris out through the hole.
If you are able to approach the area from above, you will be able to vacuum up a greater amount of the silt and debris.
Take out any keys that are obviously damaged or appear to be wobbly. Make use of a wet/dry shop vacuum that is specifically built to deal with the fine particles. Plaster will quickly destroy a vacuum cleaner that is used in the home.
Next, you need to moisten the injection holes. You may do this by either shooting water down the lath with a squirt bottle or by squirting water up into the drilled holes from the plaster surface.
By wetting the surface, the adhesive will be encouraged to go further when it is squeezed, and the drying period will be somewhat slowed, resulting in a stronger connection.
Inject The Adhesive
At long last, it's time to start injecting the glue. We make use of a latex-based substance that is essentially an adhesive for vinyl floors.
This product is water-based. On the other hand, any latex or acrylic adhesive of sufficient grade will do (for example, Liquid Nails or floor adhesive). You can purchase these products at construction supply houses and hardware stores in caulking tubes for small projects or five-gallon pails for large jobs.
We use a caulking gun with the tip cut to fit snugly in our 1/4″ holes, and inject the adhesive until the plaster moves ever so slightly (one squeeze of the average caulking gun is usually enough).
When you inject an excessive amount of glue, you risk pulling the ceiling plaster away from the ceiling. Follow up with an injected substance using a wet sponge to remove any excess glue that is left behind in the holes caused by removing the nozzle.
When you have completed the full sequence of holes, use a clean, damp sponge to go back over the plaster and remove any further glue residue that may have been left behind. If you are working on the lath side, continue with the same procedure, but consider leaving the adhesive wipe-up as an optional step.
How To Repair Cracks And Holes In A Plaster Ceiling
Repairing cosmetic difficulties, such as nail holes and gouges produced by DIY work, and patching ceiling cracks that are fine in a plaster ceiling, are examples of issues that are reasonably simple to address.
In spite of the fact that it can appear paradoxical, the greatest thing you can do is make the crack a little bit bigger. Doing so will guarantee that a sufficient amount of simple sand is packed into the crack to create a significant and strong fill (opens in new tab).
Before applying joint compound or filler with a putty knife and scraping off the excess as you go, be sure that any debris has been removed from the area with a brush. After applying a few very thin coats, you should wait for it to dry and then sand the area to get a finish that is even and smooth. The next step is to prime and paint it so that it matches the wall.
Before placing joint compound on top of the crack and smoothing it out, you might want to try covering bigger cracks with mesh or fibreglass tape first. This procedure is effective for repairing even the smallest of holes.
How To Repair A Sagging Plaster Ceiling
Traditional lath-and-plaster ceilings are those that are made by attaching strips of wood or metal mesh (referred to as laths) to the ceiling joists to establish a solid base, and then adding layers of plaster on top of that. These types of ceilings are most commonly found in older homes.
Plaster has a natural tendency to dry out, which causes it to become less cohesive and lose its ability to maintain its hold on the laths. The plaster will start to sag or bulge as the first indication of this problem.
For a task of this nature, we recommend getting the assistance of a professional; but, if you insist on doing it on your own, the following is how the do-it-yourself specialists recommend you proceed:
"To prop up the sinking plaster, use a flat piece of chipboard or plywood that has been fastened to a length of 38mm-square lumber," the instructions read. This ought should stretch all the way up to the top of the ceiling.
To gather up the loose plaster, lift the floorboards in the room above and vacuum between the joists while the bulge is in the middle of the room.
"Mix up some pretty runny boding undercoat plaster, and then pour it over the cracked plaster to replace it," the instructions say to do. Maintain the position of the supporting prop until the plaster has cured and formed a connection with the laths.
After that, you have the option of removing the old plaster or keeping it in place and resurfacing the entire area with new drywall.
Does Water Damaged Plaster Need Replacing?
It depends. In the event that current plastering treatments have been applied, you will need to determine whether or not the drywall that is located below has sustained significant water damage. Mold and discoloration on the ceiling, as well as the presence of huge holes or drooping in the ceiling, are indicators.
In this situation, the ceiling would need to be totally rebuilt, including structural parts such as beams.
Repairs aren’t normally that dramatic, however. If the damage caused by the water is only on the surface and the laths have not been compromised, you may simply replaster over the existing layer.
Can You Repair Part Of The Ceiling?
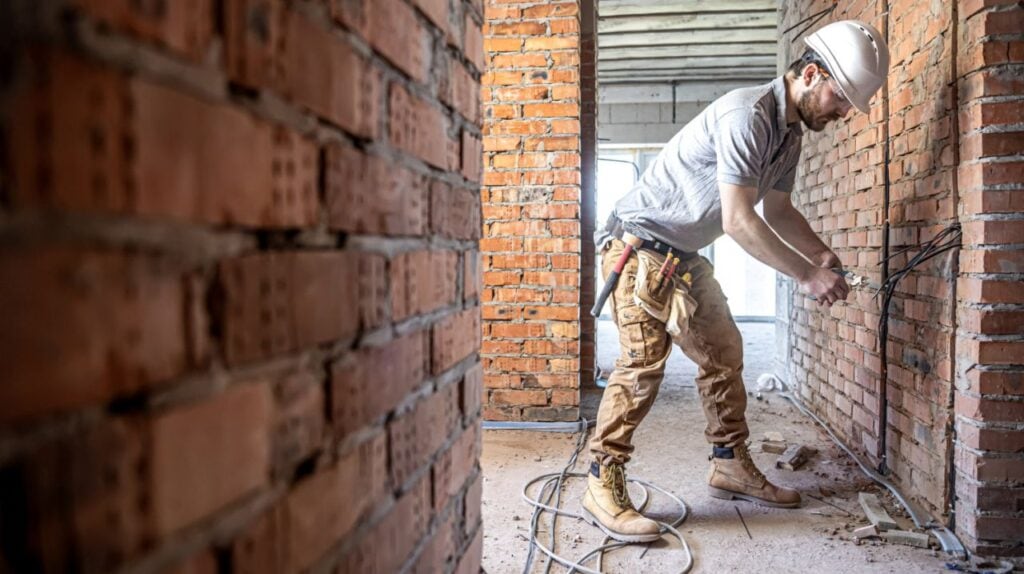
If only a tiny section of your ceiling is damaged, you should be able to execute a straightforward repair using a patch made of plasterboard or drywall. After removing the damaged section of plaster, fix the hole with drywall and secure it using drywall screws.
It is recommended that you remove any old plaster from the surface of the wall before purchasing plasterboard to use as a repair patch. According to the do-it-yourself gurus at B&Q, "then you may pick the thickness that is closest to the depth of your plaster."
Ceiling Crack Repair — Is it Easy?
To tell you the truth, there is no part of plaster ceiling restoration that is simple. Yet, it is something that you may tackle as a do-it-yourself project. When ceiling cracks in plaster ceilings are repaired using the appropriate techniques and equipment, the ceilings can take on the appearance of being brand new.
The loosening of the plaster is almost often the root cause of the crack. As a result, you need to raise it back into position using several drywall screws that have plaster washers attached to them.
Place each of these 40mm drywall screws approximately six inches away from the fissure throughout its length. After that, using a utility knife, enlarge the crack by cutting at a 45-degree angle away from the crack on both sides. This will make the crack larger.
After applying the initial layer of pre-mixed joint compound, cover the crack with drywall tape by cutting a piece the same length as the crack itself. Apply the joint compound with a trowel to the crack, and then cover it with screws. Now, cover the crack with the tape, and apply a second coat of joint compound over the tape.
Trowel the mixture using circular motions until it reaches a smooth consistency. After allowing it to dry completely, sand it using sandpaper that has a grit of 100. Once you have painted the area with primer and given it time to cure for twenty-four hours, you should apply two coats of paint over the whole ceiling.
Can I Fix My Own Ceiling?
It is dependent on the level of damage that has to be repaired as well as the type of finish that you want. Minor issues such as cracks and water damage are easy enough to DIY, however, larger fixes should be dealt with by professionals to ensure the ceiling is repaired to recommended safety standards.
It is essential to handle any problems with repairs as quickly as you can, regardless of whether you choose to do the work yourself or consult a professional. If you put off addressing issues for an extended period of time, it might result in more expensive difficulties in the future.
Conclusion
In conclusion, fixing a plaster ceiling may seem like a daunting task, but it is possible to do it yourself with the right tools and instructions. By following the step-by-step guide provided in this article, you can restore your plaster ceiling to its former beauty and avoid costly repairs by hiring a professional.
Remember to assess the damage, clean the area, apply a plaster patch, sand the area, prime and paint, and maintain your plaster ceiling to prevent further damage. With these simple steps, you can enjoy a beautiful and sturdy plaster ceiling for years to come.
Content Summary
- Plaster ceilings are a beautiful and timeless addition to any home, but over time they can become damaged, cracked or even start to sag.
- With the right tools and knowledge, fixing plaster ceilings can be a straightforward and rewarding DIY project.
- By injecting glue between the plaster and lath in the areas where the keys (anchors) have been detached over time in many older ceilings, we have been able to repair them properly.
- In this comprehensive guide on how to fix plaster ceilings introduction, we will cover everything you need to know to repair your plaster ceiling and restore it to its former glory.
- From assessing the damage to repairing and refinishing your plaster ceiling, we've got you covered.
- If there are no broken keys or debris in the way, the plaster will sit normally.
- Instead, you should merely use the palm of your hand to coax the plaster into place gently.
- The natural process of age and settling is likely the origin of the majority of the plaster cracks in the ceiling; nevertheless, there may be another concern at play here.
- You will need to figure out what initially caused the damage to your ceiling in order to get started on any kind of repair work on it.
- It is quite likely that the crack in the plaster ceiling was caused by anything purely aesthetic, such as fluctuations in temperature or work done on the ceiling by the homeowner themselves, for example.
- In the event that the crack in question runs the length of the wall as well as the ceiling, you will need to investigate the reasons behind wall cracks in order to find a solution to the problem.
- We use a carbide drill bit that is 1/4 inches in diameter to create injection holes.
- When you have drilled your injection holes, you will need to vacuum away the debris and drilling dust that was created throughout the process.
- If you are able to approach the area from above, you will be able to vacuum up a greater amount of the silt and debris.
- Next, you need to moisten the injection holes.
- At long last, it's time to start injecting the glue.
- When you inject an excessive amount of glue, you risk pulling the ceiling plaster away from the ceiling.
- If you are working on the lath side, continue with the same procedure, but consider leaving the adhesive wipe-up as an optional step.
- Before placing joint compound on top of the crack and smoothing it out, you might want to try covering bigger cracks with mesh or fibreglass tape first.
- Traditional lath-and-plaster ceilings are those that are made by attaching strips of wood or metal mesh (referred to as laths) to the ceiling joists to establish a solid base, and then adding layers of plaster on top of that.
- The plaster will start to sag or bulge as the first indication of this problem.
- This ought should stretch all the way up to the top of the ceiling.
- In the event that current plastering treatments have been applied, you will need to determine whether or not the drywall that is located below has sustained significant water damage.
- If only a tiny section of your ceiling is damaged, you should be able to execute a straightforward repair using a patch made of plasterboard or drywall.
- It is recommended that you remove any old plaster from the surface of the wall before purchasing plasterboard to use as a repair patch.
- To tell you the truth, there is no part of plaster ceiling restoration that is simple.
- When ceiling cracks in plaster ceilings are repaired using the appropriate techniques and equipment, the ceilings can take on the appearance of being brand new.
- This will make the crack larger.
- Apply the joint compound with a trowel to the crack, and then cover it with screws.
- In conclusion, fixing a plaster ceiling may seem like a daunting task, but it is possible to do it yourself with the right tools and instructions.
- By following the step-by-step guide provided in this article, you can restore your plaster ceiling to its former beauty and avoid costly repairs by hiring a professional.
- Remember to assess the damage, clean the area, apply a plaster patch, sand the area, prime and paint, and maintain your plaster ceiling to prevent further damage.
Frequently Asked Questions About Plastering
The good news is, it's possible to repair and rescue plaster ceilings from further damage. We have successfully reattached many old ceilings by injecting adhesive between the plaster and lath where the keys (anchors) have broken away over time.
Lath-and-plaster ceilings in older houses often crack with age, and the plaster can bulge where it begins to break away from the laths. If only a small area of your ceiling is affected, you can make a simple repair with a plasterboard patch using dry-lining techniques that you won't need plastering skills to use.
Common and often very visible, cracks in plaster ceilings seem an inevitability in older, historic buildings. Not all cracks are the same and some will continue to return if the root cause is not properly remedied.
Many older homes may still have some walls and ceilings made of plaster and lath instead of the now standard drywall or wallboard. If you have holes or cracks in your plaster walls or ceilings, repairing them isn't difficult. It can, however, require a bit more extra time and skill than patching a hole in drywall.
The lifespan of lath and plaster can extend across several centuries, if the property it is applied to is well-kept and maintained. However, the finish may require some repair work in this time to keep it in its ideal condition.


