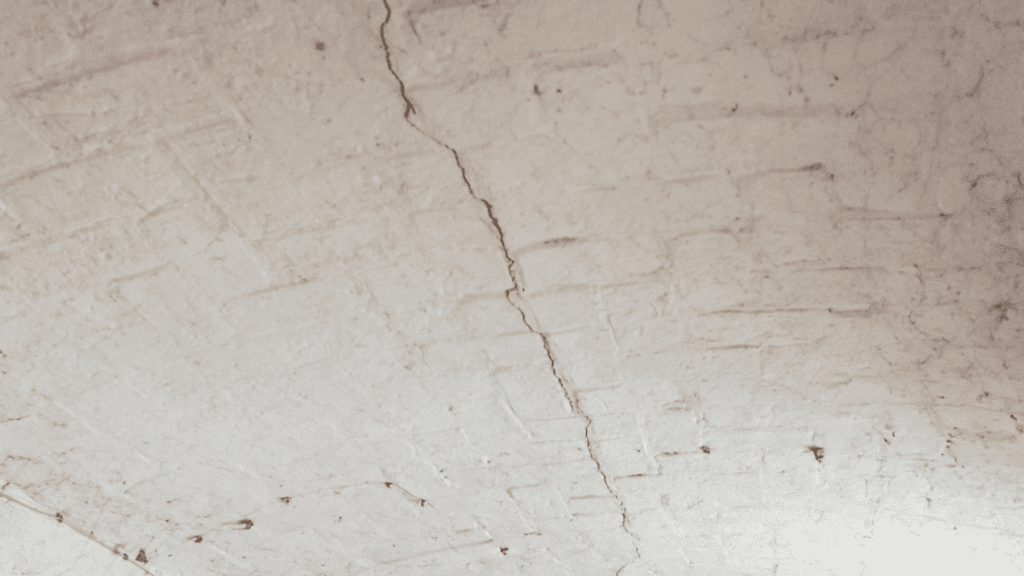
Have cracks appeared in what was previously a flawless ceiling? Don't wait any longer to fix this problem, endangering your property's value and security. In this detailed tutorial, we'll show you how to repair cracks in your ceiling using tried-and-true methods and insider advice. Learn about the most typical triggers for these cracks, identify the various crack kinds, and evaluate their severity. This article will provide you with the tools you need to repair your ceiling so that it looks new and lasts for years.
Ceiling Crack Cleaning and Taping

Cover The Hole With A Plastic Sheet
A huge piece of plastic should be laid down first because you will be stirring up dust, spreading the mud, and otherwise making a mess as you fix the break in your ceiling. By using a disposable plastic sheet, you can avoid having to clean the floor after repairing the break.
- Furniture with fabric upholstery should be moved out of the room before painting or dusting.
Arrange An A-Frame Ladder For Use
If you need to reach the top of the room, an A-frame will keep you steady as you do so. Don't make any jerky motions when on the ladder, and make sure all four of your feet are firmly planted on the ground before you start climbing. You can store your mud, tape, and other repair materials in the fold-out part across from the top rung of your ladder.
- Any hardware or home improvement store ought to carry A-frame ladders for sale. The ideal height for a ladder is between 6 and 8 feet (1.8 and 2.4 metres).
- A stepladder could repair the damage if the ceiling is low enough. However, this poses a greater safety risk because you will need a place to set your patching supplies while you work safely.
Use A Dry Wall Knife To Remove The Loose Debris
It would help if you leaned your 6-inch (15 cm) drywall knife against the ceiling near the crack at an angle of around 15 degrees. Pull it up and under any torn or missing drywall paper near the hole. Carefully cut them off with the knife so you don't nick the drywall behind them.
- You may find drywall knives at any home improvement centre, paint retailer, or hardware store. The 6-inch (15 cm) version is the most common and widely used.
Directly Over The Crack, Apply Mesh Dry Wall Tape
The adhesive on this tape ensures a secure hold on your ceiling. Tape the entire crack shut with lengthy pieces of tape. One piece of tape might be sufficient to cover the entire fissure, depending on its width. The tape should be centred over the crack and pressed firmly into place on the ceiling. Only one layer of tape should be used.
- Roll a container or pin over the tape several times to flatten it.
- This is the same tape used to seal the joints in the drywall. You may find it in any home improvement or hardware store near you.
- You should get sticky tape if the business sells different kinds.
5-Minute Mud Repairing the Crack
Add Water To The 5-Minute Mud Power Mix
Shake out roughly 0.45 kilogrammes of dry muck in a big plastic bag. Put in some tap water that is around room temperature. Holding the container over the sink, stir the 5-minute mud with the putty knife until it is uniform in colour and consistency. Add more water, stirring constantly, until the muck has the texture of mayonnaise.
- A joint compound is another option for repairing the ceiling's break. 5-minute mud, on the other hand, dries more firmly than joint compound and strengthens ceiling drywall.
- You'll soon be able to buy five-minute mud from your neighbourhood hardware or home improvement store. A 3-pound (1.4-kilogram) bag of sand ought to be sufficient. The price range for this item is USD 5 to USD 7.
- Long-drying muds, such as 20-minute mud, are also an option. You'll have more time to repair if you use mud with a longer drying period. So long as you don't make the mud too runny, it won't fall on you, but plastering a ceiling will take a little longer until you get the hang of it.
- Applying water from a spray bottle to the ceiling can encourage the mud to stick to the old plaster. Dust, grease, mould, and too flat or too loose of a surface will prevent mud from sticking.
Spread Some Of The Mud On The Hole In Your Ceiling
Spread the mud evenly in one layer using the flat side of the putty knife. Be sure to smother the mesh tape in mud. When applying the mud, do it in a straight line parallel to the fracture. The muck will dry up in 5 minutes, so get to work.
- After the first application, let the mud dry for 30 minutes.
- If the mud layer isn't even, you can even it out with a damp sponge before it dries.
If Your Ceiling Is Textured, Try Mixing Some Texture Into The Mud
Adding texture to the mud will make it easier for it to blend in with the ceiling. The type of ceiling you have will dictate the method you choose to give texture to the mud.
- Use a light paintbrush to replicate the ceiling's swirl effect in the dirt.
- If your ceiling has a knock-down texture, you can achieve the same effect by pressing a stiff, wet piece of paper into the mud.
- Use a popcorn ceiling patch spray to cover the mud if your ceiling has a popcorn texture.
After The Initial Layer Of Dried Mud Has Been Sanded, Repeat
The finished product will look more polished if the mud is sanded between coats. In a back-and-forth motion, use a sanding sponge to smooth out any clumps of gritty mud.
To Make More 5-Minute Mud, Mix Another Batch
If you want the second layer to be thinner than the first, dilute the sand with extra water from the sink. A second, thinner application of mud can hide any imperfections in the first. Stir this mixture until it has a texture similar to sour cream.
- Any dry sand trapped in the crevices of the plastic mixing container can be easily removed using a putty knife.
Put On Another Layer Of Mud
Apply the second layer using the same method as the first. Completely smother the mesh tape in mud. After sanding and painting the ceiling, this coating should hide the grid pattern left by the tape.
- This second coat of mud will take 30 minutes to dry, just like the first. It will dry in 5 minutes, but you should wait a little longer to ensure it's completely dry before painting on it.
Completing the Maintenance
Remove The Mud Layers By Sanding Them Down
The structural damage from the crack has been fixed; the next step is to smooth up the rough spots. Use the sanding sponge to scrub the mud off the surface. The dried mud patching the crack should be sanded with a back-and-forth motion until smooth and level with the rest of the ceiling.
- Sanding sponges are available at most home improvement stores. Choose a sanding sponge with a fine grain if different grits are available.
- It could get messy if you sand off a lot of the dried muck. As much as possible should land on the plastic sheet you've spread out. Drop cloths should protect any remaining upholstered furniture in the room.
- The third coat of mud should be more liquid than the first two, and it should be applied with a 14- or 18-inch trowel if you want a smooth ceiling. The longer trowel will reach into the cracks and fill them in, levelling the ground.
Look For A Shade Of Paint That Goes Well With Your Ceiling
It would help if you painted the sanded and patched section of the ceiling to blend in with the rest. You can cover up the patched crack by painting over it with any paint that was left over from when you or your contractors originally painted the ceiling.
- If you don't have any paint left over, you can find a complementary shade in a hardware store or paint store. Paint may be sold and mixed at larger hardware stores.
- Get some paint sample strips and check them against your ceiling to see which comes closest.
- There is also the option of taking a small paint swatch to a hardware store or paint retailer and having the colour matched on a computer.
After Sanding A Section Of The Ceiling, Paint It
About half a cup (113 grammes) of paint should be poured into a metal painter's tray when ready. Move the roller brush up and down in the paint until it is completely saturated. Then, paint your ceiling, starting at one end of the repaired crack and working your way to the other.
- The ceiling should be a uniform colour and texture after you're done painting and the paint has dried.
When A Ceiling Cracks and What Causes It?
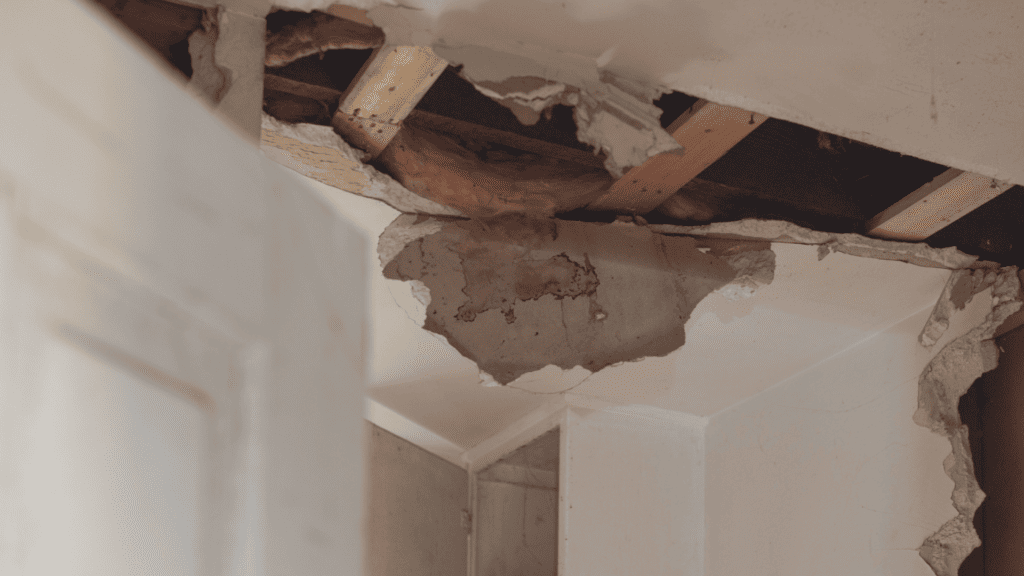
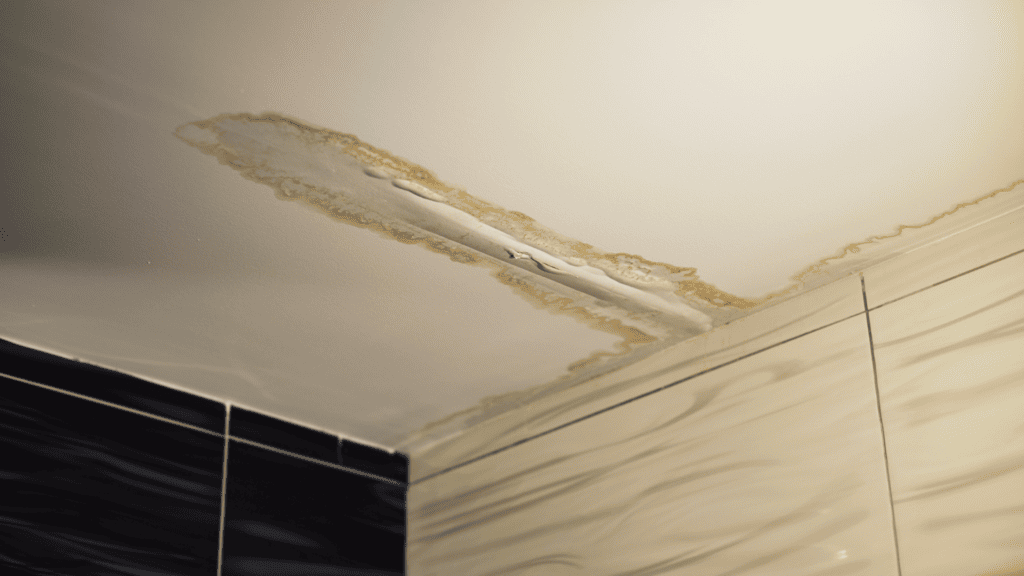
The severity of the damage caused by ceiling cracks varies depending on the reason. The moisture accumulation usually causes water damage, which manifests as cracks and a drooping ceiling. If this is the case, more than fixing the fractures will be needed; the underlying issue must also be addressed, lest the ceiling suffers extensive damage or collapses.
Mould and insects are other common after-effects of water damage, and eliminating them may need a combination of methods. Damage to the structure, shoddy construction, shifting ground, or the natural settling of a new house (sometimes accompanied by cracks in the walls) are all possible reasons for a cracked ceiling. Houses several decades old are more likely to display signs of wear and tear than newer ones.
Why You Should Always Keep Your Ceilings Clean?

Relax And Take It Easy
Since the average Canadian has trouble reaching the ceiling, it is typically neglected when cleaning. However, since ceilings are often ignored, they provide a perfect environment for dust, insects, and cobwebs. To restate, dust mites and other bacteria love a dirty ceiling because it provides the ideal nesting conditions.
Also, stains on the ceiling from lack of maintenance are an eyesore that can give guests a negative first impression of your property. Therefore, we advise you to thoroughly clean every nook and cranny, treat stains, get rid of insects, and wipe down surfaces to promote a healthy environment.
You and your family can relax and experience fewer allergy symptoms if the dust, grime, and cobwebs are removed from the ceiling.
Security First
Cleaning your ceiling will also serve as a helpful reminder to keep the rest of the room in working order. You may be asked to clear the vents and registers and double-check the batteries on your smoke alarms. While you're about it, change out any burned-out bulbs and put fresh batteries in your home's smoke and carbon monoxide alarms. In addition, it's a good idea to check the functionality of your home's sprinkler system every so often.
Ceiling stains that keep appearing are usually a symptom of a larger issue. A big leak is one possible source of such discolouration. We advise that if you have any doubts, you have a professional inspect your ceiling. In the long run, you will save more money if they catch the issue when it is still little.
Trust The Experts
Ceiling cleaning and maintenance might be difficult to do on your own, so it may be advisable to hire a professional service. For instance, you could wind up cleaning the ceiling with chemicals that are harmful to your health and cause more harm than good. Many commercially available cleaning solutions release toxic vapours that induce vomiting, headaches, and dizziness.
If you hire cleaners, they won't use harsh chemicals or abrasive sponges that could scratch the ceiling.
Falling when cleaning the ceiling might result in catastrophic injuries like concussions and broken bones. Another consideration you should make if you intend to clean the ceiling on your own is the possibility of damaging its finish and texture.
In conclusion, grime, dirt, and dust that can cause major respiratory issues, especially in the young and the old, can easily settle on ceilings and become embedded in the air. Thus, cleaning your ceiling will not only enhance the health of everyone in your home but will also make your home seem better and feel better to spend time in.
When you clean your ceiling, you'll be reminded to check for leaks and other problems that can save you money in the long run and even your life. These include replacing the batteries in your smoke and carbon monoxide detectors, restoring functionality to broken sprinklers, and clearing out any accumulated mould or asbestos.
Conclusion
Repairing cracks in your ceiling can be a simple and effective solution that can save your property's value and security. To begin, cover the hole with a disposable plastic sheet and arrange an A-frame ladder for use. Use a 6-inch (15 cm) drywall knife to remove loose debris and tape the entire crack shut. Apply mesh dry wall tape directly over the crack, ensuring a secure hold.
Add water to the 5-minute mud power mix and stir until it is uniform in color and consistency. Mix a joint compound or 5-minute mud with water to strengthen the ceiling drywall. Spread the mud evenly in one layer, smothering the mesh tape in mud. Allow the mud to dry for 30 minutes. If the mud layer isn't even, even it out with a damp sponge before it dries.
If your ceiling has a texture, mix some texture into the mud to make it blend in with the ceiling. Use a light paintbrush to replicate the ceiling's swirl effect in the dirt or press a stiff, wet piece of paper into the mud. Use a popcorn ceiling patch spray to cover the mud if it has a popcorn texture.
After the initial layer of dried mud has been sanded, repeat the process with a sanding sponge to smooth out any clumps of gritty mud. If needed, dilute the sand with extra water to make a thinner layer. Apply the second layer of mud, smothering the mesh tape in mud. Allow the second layer to dry for 30 minutes before painting.
Complete the maintenance by sanding the mud layers down, smoothing up rough spots, and sanding the dried mud patching the crack. Choose a sanding sponge with a fine grain if different grits are available. Clean your ceiling by spreading out a plastic sheet, using drop cloths to protect upholstered furniture, and applying a third coat of mud with a 14- or 18-inch trowel for a smooth ceiling. Look for a suitable paint shade and paint the sanded and patched section of the ceiling to blend in with the rest. If you don't have any paint left over, find a complementary shade in a hardware store or paint store. After sanding, paint the ceiling, starting at one end of the repaired crack and working your way to the other.
Cleaning your ceiling is essential for maintaining a healthy environment, as it provides an ideal environment for dust, insects, and cobwebs. Dust mites and other bacteria love a dirty ceiling, and stains on the ceiling can give guests a negative first impression of your property. Thorough cleaning, treating stains, getting rid of insects, and wiping down surfaces can promote a healthy environment.
Cleaning your ceiling also serves as a reminder to keep the rest of the room in working order, such as clearing vents, batteries, smoke alarms, and sprinkler systems. If stains persist, it's usually a symptom of a larger issue, such as a leak. If you have doubts, have a professional inspect your ceiling to catch the issue early.
Have a professional service if you're unsure about cleaning your ceiling, as they won't use harsh chemicals or abrasive sponges that could scratch the ceiling. Falling when cleaning the ceiling can result in catastrophic injuries like concussions and broken bones. In conclusion, cleaning your ceiling not only enhances the health of everyone in your home but also makes it feel better to spend time in.
Content Summary:
- In this detailed tutorial, we'll show you how to repair cracks in your ceiling using tried-and-true methods and insider advice.
- Learn about the most typical triggers for these cracks, identify the various crack kinds, and evaluate their severity.
- This article will provide you with the tools you need to repair your ceiling so that it looks new and lasts for years.
- A stepladder could repair the damage if the ceiling is low enough.
- The adhesive on this tape ensures a secure hold on your ceiling.
- Tape the entire crack shut with lengthy pieces of tape.
- The tape should be centred over the crack and pressed firmly into place on the ceiling.
- This is the same tape used to seal the joints in the drywall.
- Shake out roughly 0.45 kilogrammes of dry muck in a big plastic bag.
- A joint compound is another option for repairing the ceiling's break.
- 5-minute mud, on the other hand, dries more firmly than joint compound and strengthens ceiling drywall.
- Applying water from a spray bottle to the ceiling can encourage the mud to stick to the old plaster.
- Adding texture to the mud will make it easier for it to blend in with the ceiling.
- Use a popcorn ceiling patch spray to cover the mud if your ceiling has a popcorn texture.
- Apply the second layer using the same method as the first.
- Completely smother the mesh tape in mud.
- After sanding and painting the ceiling, this coating should hide the grid pattern left by the tape.
- This second coat of mud will take 30 minutes to dry, just like the first.
- The structural damage from the crack has been fixed; the next step is to smooth up the rough spots.
- The third coat of mud should be more liquid than the first two, and it should be applied with a 14- or 18-inch trowel if you want a smooth ceiling.
- It would help if you painted the sanded and patched section of the ceiling to blend in with the rest.
- You can cover up the patched crack by painting over it with any paint that was left over from when you or your contractors originally painted the ceiling.
- Get some paint sample strips and check them against your ceiling to see which comes closest.
- Move the roller brush up and down in the paint until it is completely saturated.
- Then, paint your ceiling, starting at one end of the repaired crack and working your way to the other.
- The severity of the damage caused by ceiling cracks varies depending on the reason.
- Houses several decades old are more likely to display signs of wear and tear than newer ones.
- Since the average Canadian has trouble reaching the ceiling, it is typically neglected when cleaning.
- However, since ceilings are often ignored, they provide a perfect environment for dust, insects, and cobwebs.
- Also, stains on the ceiling from lack of maintenance are an eyesore that can give guests a negative first impression of your property.
- Therefore, we advise you to thoroughly clean every nook and cranny, treat stains, get rid of insects, and wipe down surfaces to promote a healthy environment.
- You and your family can relax and experience fewer allergy symptoms if the dust, grime, and cobwebs are removed from the ceiling.
- Cleaning your ceiling will also serve as a helpful reminder to keep the rest of the room in working order.
- In addition, it's a good idea to check the functionality of your home's sprinkler system every so often.
- We advise that if you have any doubts, you have a professional inspect your ceiling.
- Ceiling cleaning and maintenance might be difficult to do on your own, so it may be advisable to hire a professional service.
- Another consideration you should make if you intend to clean the ceiling on your own is the possibility of damaging its finish and texture.
- When you clean your ceiling, you'll be reminded to check for leaks and other problems that can save you money in the long run and even your life.
Frequently Asked Questions About Ceiling Cracks
To minimise the chances of cracks reappearing, address any underlying issues causing the cracks, such as addressing water leaks, maintaining stable humidity levels, and ensuring proper structural support.
Yes, you can temporarily address small cracks by using a flexible caulk or sealant to fill the gap. However, these solutions may not be as durable as a proper repair and may require regular maintenance.
Some settling and minor cracks can be expected in newly constructed buildings as the structure adjusts. However, if the cracks are significant or rapidly widening, it's advisable to consult the builder or a professional for evaluation.
While paint can temporarily mask small cracks, it is not a long-term solution. Over time, the cracks may reappear, and the paint may not adhere properly, resulting in an unsightly appearance.
The time required to fix ceiling cracks depends on the crack size and the repair method used. Small cracks can usually be repaired within a day, while larger or more complex repairs may take several days or longer, especially when involving professional assistance.


